“Here you’ll find a comprehensive guide on every type of trickjump available in Quake 2. Complete with instructive demos, it will provide an excellent starting point for players wishing to become experts at jumping.”
https://web.archive.org/web/20010722074543/http://www.planetquake.com/rtr/tutes_q2_trick.html
Double Jumping
The doublejump is probably the most widely-known q2 trickjump. It lets you jump a lot higher (or a lot further) than normal by utilising an appropriately-sized block (about the height of two to three average stair steps). To do it, find a block of said description (try the one in the Central Area just next to the shotgun), and position yourself a small run-up from it. Run towards it, and just before you hit it, hit your jump button TWICE quickly. If it didn’t work; that’s fine, it takes practice. If you ended up jumping over it, or on top of it, you’re too far away when you jump. If you jumped into it, you’re too close. If you did what appears to be just a regular jump off the block; you took too long pressing jump the second time. Keep practicing!
demo: Normal Long Doublejump
A much easier doublejump (but not as versatile) needs a similarly sized block, but it needs to be in a corner. The best example is the classic doublejump location: getting the mega on q2dm1. In the Mega Room, go up the the mega side of the backpack. See the small block you usually jump on to get the backpack? That’s what you’ll be doublejumping off, to get up to the block above the backpack. Push yourself into the corner made by the small block and the block the backpack is on. Look down into the corner, push forward, and jump twice in rapid succession, just like the previous example. With a bit of luck, you’ll propel yourself upwards and – with a little air control – onto the highest block.
demo: Normal High Doublejump
If you’re having trouble performing these jumps – and difficulty in performing the corner one is the best indicator – your framerate may be too low. Go up to the corner block described in the last example and type “timerefresh” (without the quotes) into the console. You’ll spin around and be told your framerate in Frames per Second (fps). If it’s really low (like under 20) you’ll probably have trouble performing consistent doublejumps (try, initially, reducing your resolution and/or texture detail, or check out some of the framerate-optimising sites out there). Try also just looking directly into the ground before you perform the doublejump… this is really only practical for the corner jumps, but can push those frames up enough to make the doublejump easier for you.
Advanced Stuff:
Without going into a technical description (that’ll come later ;), doublejumps work by the second jump being somehow affected by the velocity of the first jump. This premise can be extended to other areas… for example, rocket-doublejumps. This uses a rocketjump instead of a regular jump as the first jump, and looks pretty amazing. It’s also fricken’ difficult!! Note you only use ONE jump for the final jump (as the first jump is the rocketjump). I don’t think anyone out there has mastered rdj’ing enough to be able to perform it in any given position with any reasonable amount of consistency. But it’s sure possible. On q2dm1, you can perform a rdj from the Yellow Armour in the Central Area all the way up to the Grenade Launcher Platform (by rocketjumping up to the hyperblaster, then doublejumping off the Hyperblaster Platform as you sail past it). This particular jump seems to be the easiest of the lot; and I’m sure with a not insiginificant amount of practice one could develop their skills enough to use it with accuracy in a real game.
Additionally, one is not limited to merely two jumps. You can use the velocity gained by a doublejump to again doublejump off a higher level… commonly referred to as “triplejumping”, an example is on BUNK1 (see demo below). It’s believed you can jump like this indefinitely, but so far no-one has found a spot in any map (id- or user-created) that has the right positioning to permit a fourth-degree or higher jump. Actually, did anyone manage to do a fourth-degree jump on CJA? I know people were trying it; not sure whether anyone ended up getting it.
demo: Triplejump
https://web.archive.org/web/20000525191336/http://www.planetquake.com/rtr/t_doublejump.html
Weapon Jumping
Weaponjumping has been around since the days of Classic Quake and you can probably put money on them being in all future id FPS games. Basically, you simply jump off the explosion made by a weapon such as a rocket launcher. I’ll cover the simplest weaponjump – the rocketjump – here, and move on to the rest in the Advanced section.
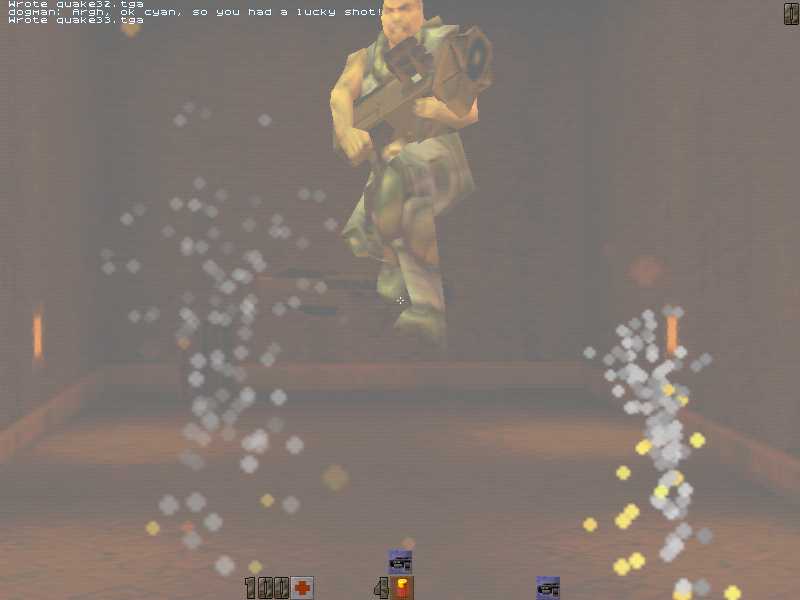
Rocketjumping is pretty simple: Look down at your feet, then fire a rocket and jump simultaneously. This is usually easiest if you have fire and jump both as mouse buttons. You will propel yourself an incredible distance upwards, but the drawback is you’ll lose up to 53 health (depending on armour and how “perfect” the rocketjump was executed). If you vary how much you look down, you can give up some height in return for distance; so if it’s distance you need rather than height you should aim at the ground infront of you so that when you fire a rocket, only the edge of the explosion hits you.
demo: Simple Rocketjumps
Advanced Stuff:
Okay, prepare for a rather large Advanced Stuff section, ’cause there’s a hell of a lot more to weaponjumping than described above :).
First of all, note that any explosive weapon can be used – that being the rocket launcher, grenade launcher, hand grenades and the BFG. These are listed in order of usefulness, with of course the BFG being pretty useless due to its incredible damage infliction (but it does give you the most height with a single, non-quadded weapon).
To perform a grenadejump, you have to have good timing: There’s a delay before the grenade explodes (something like 2.5 seconds from launch; I’m not sure of the exact figure), and it’s really just a matter of experience so you can judge perfectly when a grenade explodes. To be safe, you generally jump a bit earlier than when the grenade explodes as you’ll still get distance this way whereas if you jump AFTER it explodes, you will just be knocked back. Handgrenades are basically the same, except the wait is longer; a handgrenade explodes ON the fourth audible major tick. Because of the ticking, handgrenades are often easier to jump off than those out of a grenade launcher but they’re less practical in a real game due to the longer delay before exploding.
demo: Simple Grenadejump, Simple Handgrenadejump
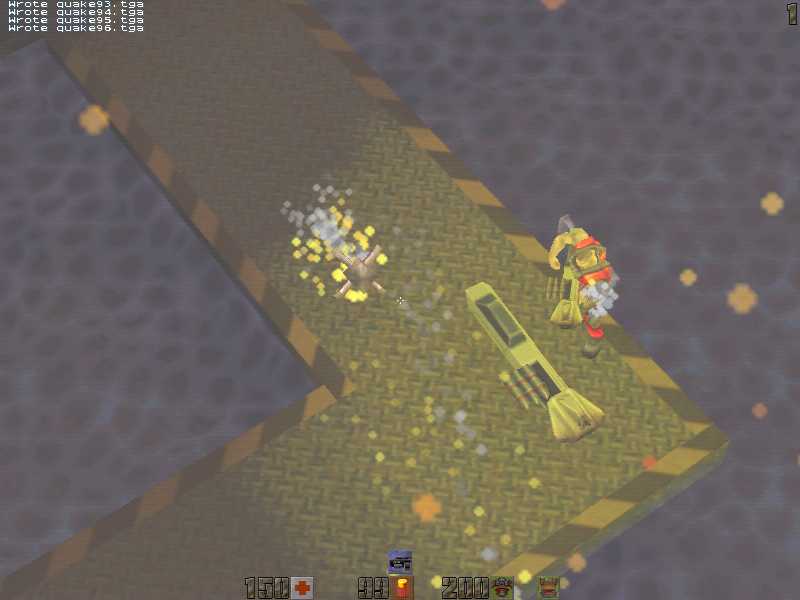
BFG Jumping is possible, although rarely (if ever) used in a real game. Note the delay after firing, so it’s a matter of looking down, firing, waiting a bit and then jumping. With a little bit of practice you’ll be able to judge the timing pretty well. BFG Jumps give you excellent height, but will neatly remove the majority of your health — you’ll need over a hundred health to survive a full self-inflicted blast. It can be useful on q2dm2, as you can BFG Jump from the area above the ladders in the Twin Lift Room all the way up to the red armour. That way you recover more armour than you lost, and hopefully, take out a few people who are sharing the ledge with you :).
demo: Simple BFG Jump
Explosive weapons are not the only weapons you can jump off – you can use others aswell. The catch is, they have to be fired by someone else :). This trick (called a third-person weaponjump) is very rarely used; personally I’ve used it maybe once or twice in a game where I was using the technique seriously rather than just playing around. It’s pretty much only practical with the super shotgun or railgun. The trick is to predict when your opponent is going to shoot you, then jump TOWARDS your destination just before they do and hope your opponent can aim ;). The last time I used it was playing against gladiator bots on q2dm1; I was out of rockets in the Outdoor Area and my opponent was dancing around my trying to land a rail. I didn’t have any other suitable weapons, but I did have a bit of health, so I positioned myself under the Rocks (where the rockets, health and armour are located) and dodged his shot. Then I stood still and waited for his next shot, and knowing that he would shoot the instant the railgun reloaded, I was able to time the jump and he hit my feet, launching me up onto the Rocks. Like I said, it’s very, very rare you’d ever use it; but it’s a pretty cool show-off trick so it’s worth trying out with a few mates on a LAN.
Like most jumps, you can combine weaponjumps very well with other types of trickjump. There are two case which have only been discovered recently (as in several months ago): I’ve dubbed them double-rocketjumping and rocket-doublejumping. The former is pretty easy; you perform a doublejump but instead of just hitting jump for your second jump, perform a rocketjump. So, instead of jump-jump it becomes jump-rocketjump. The result is a higher jump than would be possible by just standing on the block you jumped off and rocketjumping. Rocket-doublejumps are significantly harder, and I for one haven’t developed it to a stage where I’d use it in a serious game. You have to find a spot that has a ledge about rocketjumping distance from the ground. Stand about a foot away from where the ledge overhangs the ground, and rocketjump towards the ledge, then jump as soon as you hit the side of the ledge. VERY difficult jump, but if you COULD master it, has many applications. You can apply both these techniques to other weaponjumps aswell (note for a double-grenadejump, the grenade should go right on the edge of the top of the block you’re planning on jumping off).
demo: Double-rocketjump (rocket-doublejump demo coming!)
On the subject of combining weaponjumps with other trickjumps; you will find that it is much easier to do a maximum distance weaponjump if you do a strafejump or, even better, a circlejump as opposed to a normal jump off the explosion. This method can help compensate for any loss in distance caused by a lower-than-optimal framerate. Infact, I believe that you will get more distance with a strafe-rocketjump or circle-rocketjump (there’s two new terms for the collection ;), than with a normal rocketjump.
Aswell as combining weaponjumps with other trickjumps; you can also combine different types of weaponjump. The most popular example is a grenade-rocketjump: You launch (or throw) a grenade, but instead of jumping off it, you perform a rocketjump off it. Timing, etc, is exactly the same. If you have a wall next to you that extends pretty high, you can also perform a rocket-rocketjump (sometimes called a twin-rocketjump). You rocketjump against the wall, then when you’re almost at the peak of your jump you fire another rocket into the wall and aim it so it propels you as vertically as possible (so you aim at part of the wall below you, but not too far down that you won’t get enough splash or miss it completely). This will take off even more health, but will give you that extra boost that is sometimes needed. Note that you don’t have to use the jump button; you can’t jump off a vertical surface. Whilst not incredibly useful in real games, there are a few spots where its use can be employed, so it’s a worthwhile trick to have up your sleeve. I am unsure as to whether a “triple-rocketjump” is possible, as you probably wouldn’t have enough time to get another rocket out before you reach the peak of the second rocketjump.
demo: Grenade-rocketjump
https://web.archive.org/web/20000621221216/http://www.planetquake.com/rtr/t_weaponjump.html
Crate Jumping (aka Pull-ups)
“Pull-ups” is the name given to jumps which exploit the pull-up bug (not explained here yet! :), which enables you to jump onto blocks higher than normal. Please note that very little are known about the theory behind trickjumps; as more is known you’ll probably find changes in how jumps are labeled and how they’re associated with each other. For now, I’ll say that pull-ups cover two different types of jump which I think are related, but I made be wrong. It is probably best to give the popular examples: the first jump, which is often called cratejumping, is most abundant in q2dm8. It lets you jump directly onto just about every crate in the level; the most used ones being in the Rocket Launcher Room. It’s highly framerate dependant, and thanks to empirical tests performed by [xeno]Julios, it’s been notioned that you need a framerate of at least 100 fps to jump directly onto one of these crates (ie. the framerate from the point of jumping to the point of landing must remain equal to or in excess of 100 fps; generally if you can timerefresh more than 100fps in this room you can make the jump). Alternatively, you can perform a “slow bunnyhop” method and make it with 84 or more fps.
The “slow bunnyhop” I’m talking about works as such: stand about two feet away from the block you want to jump onto. Jump once where you’re standing, and push forward when you start to fall. Don’t let go of the forward key until you finish the jump. When you land, immediately jump again (as you would a bunnyhop; see that section for a description of how to ensure you jump immediately upon landing), remember to still hold forward. Providing you meet the framerate requirements, you should land on the block.
demo: Cratejump using single jump demo: Cratejump using slow bunnyhop
Note that cratejumping ONLY works if the block in question is in negative z-space on the map: That is, when the map was created, whether the block is under the z-axis. If you don’t understand that, don’t worry; just know that q2dm8 is pretty much the only deathmatch level that contains crates in negative z-space :). Anthony Bailey (leader of the Quake done Quick project) did write a mathematical proposed theory on the physics behind cratejumping, and if I can dig that up, I’ll post it here for interest’s sake.
Okay, that’s the main “cratejump” out of the way. The second example is on q2dm1. In the Megahealth Room, you can run along the very bottom stair near the chaingun, then bunnyhop up to the yellow armour by first jumping onto the middle platform in the yellow armour set of blocks and then to the yellow armour itself, in the same manner you’d perform a bunnyhop. Now, I’m not sure whether this is because you get a bit of extra height from a bunnyhop (this is the probably answer), or whether it uses a variation of the pull-up method (where it doesn’t have to be in negative z-space, but instead just employs a different factor of the pull-up theory; that of coordinate approximation). I’m beginning to think maybe a bunnyhop DOES give you a bit of extra height (and the fact that you need a bunnyhop to do a cratejump with a low framerate definitely supports that theory), so it should probably go under the bunnyhop section; but for now it’s staying here :).
demo: Bunnyhop / Pullup on q2dm1
There aren’t really any other examples of this second pull-up method that I can think of right now, so that example should give you enough of an explanation to use it effectively.
https://web.archive.org/web/20000530190325/http://www.planetquake.com/rtr/t_pullups.html
Circle Jumping
Circlejumping, or just Circling for short, is probably the most sought-after type of trickjump for players still learning the jumps. It’s also the most useful, as it allows you to jump large distances with little or no run-up space. Of course, it won’t get you as far as a bunny with a good run-up; but as opposed to a normal strafejump they’re excellent. Actually, there is a special type of strafejump known as a circle-strafejump that can get you even FURTHER than a circlejump, but the normal circlejump should still be learnt as it has iuts uses in places where the CSJ can’t be used effectively.
To circlejump, then: Basically, the idea is you jump while turning the mouse. In practice, though, it’s a lot trickier (when learning) than it sounds :). The best way to learn is to follow an example: Take the Mega Room in q2dm1. Performing a regular doublejump on the backpack block will get you to the top block. From here, you’re probably used to either jumping to the wall light then to the mega, or strafejumping directly to it. Well, we’re now going to practice circlejumping there :). When on the top block, aim at the left wall light. Stand at the corner closest to the yellow armour, but not too close so that you haven’t got any room to your right. You should be about a quick tap of the strafe key from both the right edge and the edge behind you. Now, what you’re going to do is run towards the light, then when you’re just past halfway across the block, start turning to the right. Time your turn so that when you reach the end of the block, you’re facing the megahealth or a bit past it. When you get to the end, jump, while still turning to the right. Keep turning until you land (hopefully on the mega, but more likely on the ground next to it ;). Don’t expect to get it first go: you’re probably over-anxious and either spun the mouse too far, or jumped too early, or jumped too late. Practice it without the jump, and stop yourself right at the edge of the block, and see where your mouse is aiming: if it’s too far past the mega, or too short, keep practicing just that until you reach the edge of the block and you’re aiming at the mega. Remember, it’s a slow turn; not a flick, but not so slow that you barely turn at all :). When you make the jump, you should be aiming at about the right wall light by the time you land (but of course, it varies a lot; that’s just a guide).
demo: simple circlejump (top block to mega)
Advanced Stuff:
That demo should help you out enough to let you manage the circle to mega. Remember: at NO TIME do you press strafe when doing a circlejump! Okay, now moving on to a hard circlejump: getting from the bullets in the Outdoor Area over to the Rocks (where the armour shards are). Here, you aim in the general direction of the rocket launcher (for maximum distance with a circlejump you aim perpendicular to your target: it wasn’t necessary, nor did you really have enough room for, in the mega one). Then, run along to just before the rockets (’til the pathway begins to curve), and start turning right here, then jump right one the end bit before the curve – still turning, of course – and with a bit of luck you’ll sail across to the armour shards. Now, one of the first things I should say is that circlejumps become INFINITELY easier with a high framerate. Standing on the pathway, pull down the console (hit ~) and type timerefresh. If it’s under 30, you’re gonna have problems. Hell, if you’re getting under 60, think about doing something about it: I can tell the difference when circlejumping between 80fps and 120fps, but I think 120fps is about the practical limit. You’ll notice that cl_maxfps is set to 90 by default: provided you don’t cap it for net play (in which case, set up some binds to alternate), change this to cl_maxfps 200 or something. 120 should do fine; but hey the more the better right? This next demo should help you with this jump:
demo: simple circlejump (but a bit harder)
Okay, that’ll take practice anyway and if you can’t do it; don’t fret: the circle-strafejump method is more suited for that area anyway (find that in the Strafejumping section). Next up, we’re gonna do the infamous Mega Sweep: collecting the major items from the Mega Room (armour, backpack, mega) in a quick and efficient manner. Start from the bottom of the stairs that lead up to the Grenade Launcher Platform. Face the yellow armour. For now, just doublejump up there and stay at the YA — later on you’ll be able to combine this, but that just complicates things :). From the YA, circlejump to the Top Block above the backpack — again, same process as always; this time you’ll be facing perpendicular to the edge of the YA block that’s closest to the backpack. Run up, turn right, jump, keep turning, land on Top Block. Takes practice; but easy once you get it. Got it? Good. Now, from the Top Block, do another circle to the mega. Easy, eh? Now go back and combine both circlejumps into one smooth motion — YA to Top Block to mega — without letting go of your forward key =). Doing this requires you to put a little more “oomph” into the second mouse turn as you need to compensate for the momentum gathered from the first jump. Okay, got that? Yeah? No? Yeah? Well, if you have, try combining all three steps: doublejump to YA, circlejump to Top Block, circlejump to mega, into the one motion. It’s easier if you start a little to the left of a direct line to the YA, and doublejump diagonally so you’re already facing closer to the Top Block. This way you don’t have to overcompensate quick as much. This technique is really, really useful in real games: a lovely, quick sweep of the three main items (just jump back down to the backpack from the mega to complete the series).
demo: advanced circlejump (two in a row)
Actually, there’s a quicker way of collecting all three major items: I’m not going to do up a demo yet, but it involves doublejumping to the yellow armour, then pulling a sharp right and bunnying with as much velocity as possible (a circle-strafejump is probably necessary) to the backpack itself, then propelling yourself again with a bunny onto the wall light to the left of the mega. It’s a pain in the neck to get right, but I suppose if you managed to get competent at it, you’d me pretty dominant in the Mega Room ;).
https://web.archive.org/web/20010725221608/http://www.planetquake.com:80/rtr/tutes_q2_trick_circlejump.html
Bunnyhopping (aka Turborunning, Straferunning)
Bunnyhopping is the term given to performing repeated jumps that are accelerated by either strafe or circle (ie. holding down a strafe button, or turning the mouse slowly). To begin with, think of it merely as repeated strafejumps. Each jump must begin IMMEDIATELY after the landing of the preceding jump. This is usually achieved by holding down the jump button before you land – this will ensure the following jump is executed the instant you hit the ground. Basically, the method for a simple bunnyhop is thus: Find a large open expanse of ground (eg. Central Area of q2dm1). Locate your destination, and turn the mouse about 45 degrees to the left of it. Perform a strafejump using the RIGHT strafe button, and while you’re in the air, release the jump button and press it again before you land. Continue holding strafe-right. Turn the mouse SLOWLY to the right. When you land, you will automatically jump again and providing you never let go of strafe-right and you were slowly turning the mouse, you will notice a surge of velocity. Repeat this process until you run out of space. To give you an idea of how much to turn the mouse; judge by noting that when you complete a bunnyhop you should be looking about 45 degrees to the RIGHT (in this case) of your target. So in total, you should aim to turn the mouse about 90 degrees. In practice, of course, the amount of turning required will depend entirely on the given situation but for now; use that as a rough guide. Once you have the basic process down – ie. you notice a speed increase – the rest is just fine-tuning and practice (lots of practice!).
demo: Simple Bunnyhop
Advanced Stuff:
Some situations – particularly, those where you have to bunnyhop around a curved pathway – make strafing as your acceleration medium very difficult. If you study the trickjump mechanics more, you will notice that strafejumping and circlejumping are very similar and I believe they operate on the same bug (some sort of triangular approximation deal is the current prediction). I assume that the Quake 2 engine deals with mouse movement by taking a circlular path drawn by the mouse, then taking n number of tangents of this circle. Okay, I just wrote a few more lines and then realised I had totally confused myself and rather rapidly came to the conclusion that I don’t know what the hell I’m talking about, so I might just leave the mathematics of it there (Anthony, you out there? Got an idea of how these two correlate? :). Anyway – my point is, due to Quake 2 repeatedly breaking movement down to a series of lines, and the engine being forced to do a certain amount of action in a certain timescale, you are artificially accelerated if you turn the mouse while in the air (it doesn’t work on the ground, I’m assuming, because Quake 2 sets an upper speed limit due to friction). Back to bunnyhopping then, and this all ties in because you can ELIMINATE the strafing from a bunnyhop and still achieve the same effect (infact, eliminating the strafe will I *think* increase your acceleration – but not terminal velocity!). Bunnyhopping without strafe is actually probably more simple in practice than regular bunnyhopping; however it seems to be an unwritten rule that you introduce someone to strafe bunnyhopping first =). The method, then, is to merely perform a regular bunnyhop but instead of strafejumping, you perform regular jumps, AND: 1. Your initial aim is usually more than 45 degrees out (say 90 degrees to start with and slowly reduce this to find a happy median); 2. You turn quicker than a normal bunnyhop. You will therefore end up aiming more than 45 degrees past your target, too; infact for best results you should finish up at JUST BEFORE 90 degrees. Go OVER that, and you will lose speed (unless you need to turn right… but that comes next).
demo: Bunnyhop using circle
Okay… now, remember at the start of the last paragraph I said that using circle instead of strafe was useful for curvey pathways? Right. As an example, picture the Mega Room of q2dm1 and where it leads to the Central Area (the SSG Pathway, that is). Okay, imagine the stretch from the middle of the Mega Room down to the SSG. You want to bunnyhop down that. It’s possible with strafe; but more natural without (and if you don’t strafe; you’ll have an EXCELLENT view of the Central Area, and can actually fire off some shots and aim a bit without being too detrimental to your speed). Alright, now to bunnyhop without strafe down to the SSG, you’d begin just inside the Mega Room, facing the backpack (so that the angle from the mega to the backpack is about 45 degrees or so). Now, bunnyhop down there without touching either strafe key. Instead, turn the mouse slowly left as you’re hopping down there, so you’re facing the SSG during your second jump or so, then facing the hyperblaster just before you hit the SSG. Practice this a few times and you’ll eventually find yourself slamming into the wall behind the SSG with some serious speed! (Lucky you don’t take damage for slamming into walls ;). You will find, with practice, that bunnying without strafe is generally a more efficient way of doing things. Personally, I only really use strafe when I’m covering short distances on ground rather than trying to leap a chasm.
demo: Bunnyhop using circle along a curved path
Speaking of which… if you’re just building up some speed on ground (and hence using strafe), and want to go in a straight line, try alternating left and right strafe when bunnying. You won’t get as much speed – because you won’t really have to turn the mouse much to adjust your aim – but it can be good for short distances.
demo: Bunnyhop using alternating left- and right-strafe
One thing to note is that you can drop a large distance when bunnying and retain your velocity. This is best illustrated with a demo:
demo: Bunnyhop with large drop in between
https://web.archive.org/web/20000621163405/http://www.planetquake.com:80/rtr/t_bunnyhop.html
Slope Jumping
Slopejumping is simply jumping off an inclined surface while moving up it. You’ll get more height this way than if you just stood and jumped.
demo: simple slopejump
Advanced Stuff:
You can, of course, combine slopejumping with most other types of jump. It’s most often combined with a weaponjump, and there’s a few places where that little extra push will get you the height or distance you need.
demo: slope-rocketjump
demo: circle-slopejump
I believe that you get more height from running up the ramp straight rather than off to the side; it is only basic physics laws that tell me this rather than empirical tests so I couldn’t be 100% sure. If you do need to run up the ramp diagonally, you can circumvent the problem somewhat by using a circlejump off it (opposite direction to that you were running in). This will make you run straight at the very last minute, but won’t change your direction as much as if you tried to turn or strafe after you’d run straight up and jumped.
https://web.archive.org/web/20010725215646/http://www.planetquake.com/rtr/tutes_q2_trick_slopejump.html
Water Jumping
When you’re getting out of the water, quake 2 gives you a little boost so you can make it onto land. You can use this push to your advantage, and perform what APPEARS to be a doublejump of sorts if there’s a ledge just above the water. The best example is on Q2DM4, where the BFG is: it’s possible (somehow; I haven’t managed it myself) to jump onto the frames of the openings to each hallway. I’m not sure of the process (can someone out there do it, and provide a quick guide?), but it appears to involve doublejumping (somehow) off the lip of the walkway as you rise from the water.
An easier way of utilizing this pull-up is to rocketjump off it. It can be a little hard to control yourself when you’re in the air, but sometimes it can be useful as a surprise tactic.
demo: Water-rocketjump
Sorry about the lack of info on this jump – I haven’t yet been able to accomplish it with any degree of consistency and thus haven’t been able to formulate a ‘correct’ technique for it. Perhaps someone who can perform this jump can provide a better explanation?