Get Yourself Acquainted
Everything you wanted to know but were afraid to ask.
The Basics section runs through what may be considered a “primer” for CTF. It explains the general and holistic concept of the game, the different gameplay settings from standard Quake II play, and a description of the powerful Techs. Basic offensive and defensive strategies are also covered, as these concepts must be understood before employing the more advanced tactics involving multiple squads and communication groups. There are many techniques and much information which fall under the generalization of “Basics.” Some of them may seem elementary, and others a bit more complex than you’d like to bother with. Experienced players can either skip this section or take it as a review of previously-learned knowledge. Beginners and casual players can look upon the Basics as a cornerstone to developing a stronger, more complete CTF strategy.
Standard Public Server Settings
So what’s the difference?
Settings in CTF are very similar to regular DM settings. Most are customizable, and thus vary with servers. There are however, a few settings that you need to be careful with.
The average public server has the teamplay set so you cannot hurt your teammates, but you can hurt yourself (and the other team of course). This is a big change from team DM, where you can hurt your teammates. This doesn’t mean that you should go around shooting your teammates, this is fact can be one of the most annoying things that can happen on a public server. In most cases the person that is shooting just forgot what team they were on. If a teammate starts shooting you, the polite thing to do is subtly remind them what team they are on.
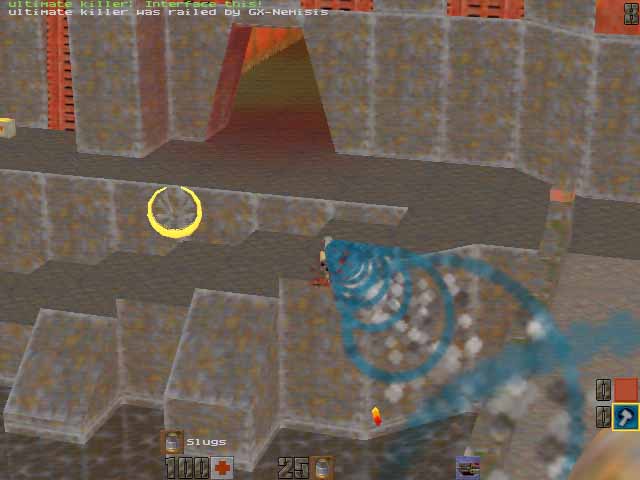
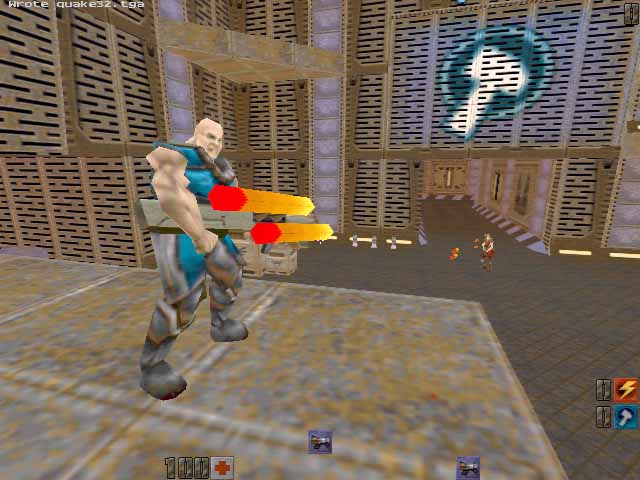
Every time you respawn, you start with not only with the blaster, but also with the grapple. Short for “grappling hook,” this device allows you to fire a hook onto any solid surface, such as a wall, pillar, ceiling, or floor, and propel yourself towards that surface at greatly accelerated speed. This can be very useful in situations when you respawn in a hot area, like the enemy’s base (and yes, you CAN respawn in the enemy base). In this case it would be a good time to use the grapple and get yourself out. Read this section on how to use the grapple efficiently.
All weapon, armor, and item respawn times are the same as they are in normal Quake and Quake 2. The new Tech power-ups respawn times are different than normal items. At the beginning of a game, they will spawn in at a random player respawn point, and “jump” a little off to the side. Any time the techs are left on the ground for 60 seconds, they will respawn at a random player respawn point.
One useful command has been added to CTF. If you type “id” in the console, you can see who you are looking at. So every time you have your crosshairs on a player, it will return the model, skin, and name above your health/armor info.

Points Distribution
What’s the point?
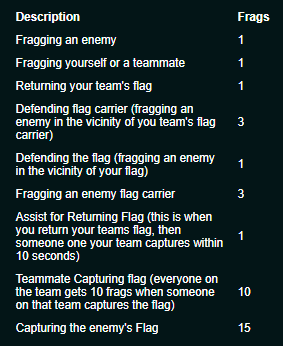
This is how your frag count is adjusted in CTF. Remember, that CTF is not about who can get the most frags, but which team has the most caps at the end of the game. You can rack up the most frags in a game, but your team can still lose if the other team has more caps. CTF in its purest form is based on caps only because this really says which team is better, not who can frag the best.
Capture the What?
Capture the Flag!
Capturing the flag is the ultimate goal of CTF (hence the name). To capture the enemy flag all you need to do is take their flag and bring it back to your base. To do so, enter their base, touch their flag (this will strap it to your back so you can run away with it), and run it back to your base, and touch your flag while it is in its return spot.
Each team’s flag will be located in the apex of their base. This point in the base should be heavily defended, therefore to get the flag you will need to either frag or outsmart the enemy defense.
Each base has more than one way to get in from the outside. The first way is direct; i.e. a front door. The second or third way is usually longer and trickier to get through, and may even be under water. Expect all of these entrances to be guarded.
If the flag carrier is killed, the flag will drop where he died. If it is left there for 60 seconds, it will respawn back at its base. However, if a player from its team touches it, it will immediately respawn back at its base. This is called saving, or returning the flag. For example, if the blue team’s flag is taken out of their base, and the red flag carrier is fragged, the blue flag will drop over his body (or gibs). If the blue flag is left untouched for 60 seconds, it will respawn back in blue’s base. However if a blue player touches the flag, it will respawn as soon as he touches it. If a red player touches the flag, he will pick it up and carry it with him back to the red base.
Weapons, Armor, Items, and the Grapple
What about the good stuff?
Read Thresh and Kenn’s Quake II bible for info on weapons. There have been no changes to weapons in CTF.
The Grappling Hook
One weapon has been added to the game of CTF, the Grapple (or Grappling Hook). The grapple allows you to target any solid object at any distance, such as a wall or ceiling, and fly towards it, latching onto it for however long you desire. You cannot, however, grapple onto the sky. To use the grapple, just type in the console, bind x “use grapple”
where x is a key of your choice, and you’re all set. When the grapple is your current weapon, just aim, shoot, and hold down the attack key. You should see a hook fly towards your target, and when it latches on, you should start flying towards that point. You will “stick” to that target as long as you hold down the attack key, and fall down as soon as you let go of the attack key.
The Grapple is tremendously important, and is virtually a trademark icon of CTF. Experienced Grapplers can be incredibly hard to hit, and can storm and escape with the enemy flag in seconds. Learn to use this tool often and well, and make it a core facet of your CTF skillset.
Teamplay
Is there an I in Team?
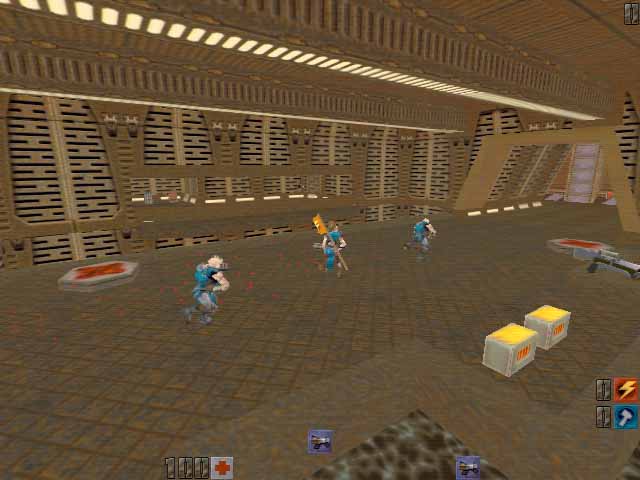
One of the most important aspects of CTF is the concept of the team. Unlike Deathmatch Free for all, where its all for none, CTF depends enormously on how well you can work with your team. Capturing the flag is never a job that can be performed by one person. The whole team must assist in some way to complete the cap. The defense needs to keep their flag in their base, while the offense needs to assist each other in bring the enemy flag home. Unlike team DM, where one person can carry a whole team, success in CTF requires full participation by every member of the team. I cannot stress enough how important your team is in CTF. You can be the best DM player on the block, but you can be next to worthless if you cannot be part of a team in CTF.
In either case, the first concept you should learn in teamplay is communication. Read the next section on communication to learn how to properly communicate with your teammates.
Next you need to learn how to help your teammates. Helping a teammate out includes covering them while they are running with the flag, helping them defend your flag, letting them give armor instead of taking it, and much more. As you can see, helping your team means more than just contributing more bullets or rockets to a firefight. In fact, in official games (where you can hurt your teammates), throwing rockets at an enemy in close combat with a teammate may be the worst thing you can do – what you can contribute to your team depends greatly on the situation. The most important thing you can do for your team is to remain aware of their general status, and their strengths and weaknesses. Sharing limited resources near your base or an attack point with injured comrades, or throwing extra weapons and ammo to respawned teammates can make the difference between a capture or a return.
Communicating with your Teammates
Ask any military tactician what is the most important aspect of conflict, and they will probably tell you “communication between your troops.” This also applies to CTF. Any CTF veteran will tell you that communication is the most important tool to learn and use while playing.
Communication Types
In Quake there are 3 types of communication: Verbal (talking), Visual (waves), and Textual (messagemode). There is a definite hierarchy in these communication types. The best type of communication is Verbal. There is nothing quicker or more customizable than yelling at your teammates. If you have never gotten a chance to do this then you should really try and set it up. You will never want to go back to your binds again! You can always tell your teammates exactly what you mean instantly.
Next in the hierarchy is textual communication. I’ve found that when you play with the same people for a long time (i.e. a clan) and you use the same binds, you can actually understand what the bind is without even reading it! So what happens is you see a bind over and over again, and your eyes get used to the shape it is in. So when you are in the middle of a battle, you can see the bind in the corner of your eye, but you won’t need to look up at the top of your screen.
Lastly is visual communication. The addition of the waves in Q2 is a good idea, but in the fast pace of CTF games they just can’t keep up. They take too much time to do, plus you have to keep the right visual angle on the person waving. In a fast game there is very little time to look at a player. They are also lacking sound. If you are not paying attention to the players around you a hand signal can be easily missed, while a verbal or textual communication is accompanied by a auditory stimulus. (big words!)
Variable Messagemode Binds
Variable binds
Added with the new Q2 engine and CTF is the ability to use binds that contain variables. In Quake I this was not possible, and many players had to use a complex binding system to relay info to their teammates. For example, to tell your team that you are at the Quad, you could use a key bound to “I’m at:” and another that says “Quad”. This was to allow players to use the “I’m at:” bind for many positions, like the pent, the enemy flag, etc. Now in Q2CTF you can eliminate all of those binds and just use a single key bound to “I’m at %l”. The %l in the bind is a variable that will display your location according to what item you are near. Here is a list of all the variables you can use in Q2CTF, plus an example of each usage.
%l – This is replaced by your current location in relation to a nearby object, plus the color of the base it is in. These locations can be a flag, weapon, or special item.
%h – This returns your current health status.
%a – This returns your current armor points and armor type
%t – This returns any techs you are holding.
%w – This returns your current weapon.

%n – This returns the player you are currently looking at. (the one that shows up when you are using “id”)
Example Offense and Defense Binds
Some examples
Textual communication can be split into 2 basic categories, Offense and Defense, with a set of binds that can be used by both. A useful communication technique that my clan developed (and I’m sure others have as well) is the use of an offense or defense identifier in front of a communication bind. For example, if your are on defense, your bind may say “D-Base is clear”, or some variation of that. What this does is allow the two separate groups to stay focused on their jobs, and not have to read the communication of the other group. I.e. when I’m on Offense, it doesn’t help me much to know if there is an enemy incoming from the back entrance when I’m in the other base trying to get their flag! After playing with these binds for a while with a team you will quickly be able to tune out the binds you don’t need to read, while at the same time tune in the binds that you do need to read. If you play with your clan a LOT, you will even get to the point where you won’t even need to read the bind, but just the “shape” of the onscreen text out of the corner of your eye will tell you what it is.
Placement of binds is also an important topic. By now you’ve probably rebound your most-used weapon keys to more convenient locations. A lot of Q2 players I’ve seen use the WASD inverted T movement keys have bound their use weapon keys to the Q, E, R, F, Z, X, C or V keys. These keys allow a minimal amount of movement by your fingers to use them, plus they can be pressed without looking down from your screen. In the same manner it is important to place your communication binds so that you can access them with little or no movement by your eyes and/or hands to use them. For example, if you use the WASD movement config, you would not want to put a comm. Bind over on the INS key. Also “Hot” keys (ones that are used the most often) should be the keys that require almost NO movement by your fingers. F1-F4 keys (assuming you are using a standard 101-key keyboard, with 12 F keys) are great to use, and even keys such as R, T, F, and G. It is important to stress that you should use whatever configuration is most comfortable to you. Placing communication binds is also a matter of taste, much like the placement of any binds. You should keep these considerations in mind while you are figuring out the best config for you.
It is recommended that you use the F keys or the number keys (given that you have rebound the use weapon keys) for all your communication binds, as these give you the least amount of movement needed, and offer the best layout for organization.
Here are a few example configs. These configs are meant to be used in public pickup games, as more complex bindings are needed for more advanced team tactics. Again you should use a key configuration that is the most comfortable for you.
Defense:
bind F1 “say_team D-Enemy spotted %l!”
bind F2 “say_team D-Enemy incoming to flag!”
bind F3 “say_team D-Flag in danger!”
bind F4 “say_team ALL-FLAG TAKEN!”
bind F5 “say_team ALL-Flag carrier seen %l”
bind F6 “say_team ALL-Enemy has Quad!”
bind F7 “say_team ALL-Base is overrun!”
bind F8 “say_team ALL-Tech available %l”
bind F9 “say_team D-I am dead!”
bind F10 “say_team D-Base is clear”
bind F11 “say_team D-Reloading”
bind F12 “say_team D-In position with %t”
Offense:
bind F1 “say_team O-Attacking base!”
bind F2 “say_team O-Move out!”
bind F3 “say_team O-Meet at %l.”
bind F4 “say_team O-Acknowledged.”
bind F5 “say_team ALL-Friendly QUAD!”
bind F6 “say_team ALL-Enemy has QUAD!”
bind F7 “say_team ALL-What is our base status?!”
bind F8 “say_team ALL-QUAD in 30 seconds”
bind F9 “say_team O-I am dead!””
bind F10 “say_team O-We control their base!”
bind F11 “say_team O-Hiding with the flag %l, with %h/%a!”
bind F12 “say_team ALL-On offense with %t”
bind e “say_team Have Flag! Need cover %l”
Offense and Defense Strategies
This section is presented as a guide to the basic ins and outs of playing offense and defense on a public server. This includes how to prepare yourself to go for the flag, how to get into the base, and how to defend your base. For more advanced offensive tactics, which include team oriented offense, please read the Adv. Offense sections, (Coming soon!) and the Techs section.
Offense Strategies
Offense are the guys who storm the other team’s base and run the flag back for the capture. They must be good deathmatchers, grapplers, and have a keen eye for scoping out the defensive situation at the enemy base. The key to a good offense is working with your teammates. This may not be easy on a public server, but usually there are people on a server that will work with you to capture the flag. A good way to get people into the team spirit is to use some Offense binds while you are on offense. If you get a good response from your teammates, then you should keep it up. Your teammates may not respond well however; if this is the case then you should probably keep low with the binds. You should try them periodically as people quit and join in. You also may get some teammates that were quiet into using binds themselves.
Getting Started
Before attempting to go into the enemy base, you need to equip yourself with weapons and armor. A lot of people tend to forget the importance of having even the smallest amount of armor. Even if you get one armor shard it can be the difference between surviving a Rail or not. So grab some armor and weapons (preferably a rocket launcher, or whatever weapon you are proficient in fragging with) before you attack the enemy base. Knowledge of the map will help you here because you want to get your equipment as soon as possible.
Getting Into the Enemy Base
The “main” entrance into a base is the one that is easier to access, and will have more people coming in and out of it. This may be a large door, or just a wide path. Going into an enemy base this way will lead to more encounters with the enemy, weather they are going into their base to return to defense or staging an offensive roll towards your base. Getting yourself into the enemy base through this entrance is faster in the sense that it is more direct, but this path will also lead to more firefights. These fights will deplete your ammo and armor, and you may even be fragged before getting into the base. The main entrance will also be more likely to be covered by a sniper. Running into a base, fully decked out and ready to rumble just to be railed the second you step into a base is not the ideal offensive tactic.
The secondary or tertiary entrances offer fewer encounters with the enemy, but are usually narrow passages which take longer to get through. In some secondary entrances, such as the water entrance in Outlands II (Q2CTF4a), it is possible to drown in while navigating the water. Since there is a smaller chance that you will encounter an enemy while you are passing through this entrance, (it is not very efficient to go out of your base this way while you are on offense) you will most likely pop into the enemy base with all of your ammo and armor. Additionally, you will emerge deeper into the enemy base than if you entered through the main entrance.
This is a team game, so where you teammates are at this time will also determine which path you take. If you see another offensive player going through an entrance, follow them and watch their 6. Two heads are definitely better than one on offense. Remember to not get in the way of your teammate, and try not to accidentally shoot them. If you see 2 or more offensive players going through one entrance, it would probably be best if you choose another. This is because the defense will most likely go after the first group that enters a base, leaving the path for the second group more open. So if you enter the base before the other members of your team, try and distract or draw the defense towards you. This will allow the other members of your team to get the flag or attack defenders with an advantage. If the other members of the offense attack the base before you get there, it would be a good time to try and sneak past the defenders and steal the flag out from under them. Use stealth while the fight is going on, and you have a good chance at grabbing their flag.
Stealing the Flag from the Enemies
Get the flag!
The number one fact that you need to realize when you are going for the flag is that you don’t need to frag all the defenders to get the flag! Remember that your personal frag count is nice, but your whole team gets 10 frags each for your cap. Also it is a lot more illustrious to get a cap than frag a lot of people (usually a lot harder too). Usually you will have to frag a few defenders before you can touch the flag, but if you can get the flag without fragging anyone, then the results are the same. My logic is that I only frag a defender if they directly stop me from getting the flag, or if they will give me trouble after I get the flag.
If one of your teammates gets to the flag before you do, you should escort them back to your base. You have two options in this, taking point or covering their 6. Either case is good for the flag runner, better than no one covering at all. If you choose to take point for the flag runner, you need to keep a few steps ahead of them, and frag anyone that gets in your way. You also need to look back periodically to see if the flag carrier is still behind you, because something could have happened so that they had to take a different route. If you choose to take the flag carrier’s 6 (or they started running off before you could take point) you need to watch enemies that come from the sides and from the back. This requires a lot of turning and even running backward. Such a skill requires some practice and presence of mind, but is very possible, and can contribute greatly to the team.
In both of these cases, you need to have a “Secret Service” mentality. By this I mean you need to be able to throw yourself in front of a bullet if it means saving the flag carrier. This may sound counter-intuitive from normal quake playing, but it is quite necessary in CTF. You have to pretend that the flag carrier is the president, and you are his top SS agent. If you see a rocket flying his way, push him aside and take it yourself. If you die, but he caps, then your team comes out ahead (besides, you will respawn anyway). Win one for the Gipper!
Capture the Flag!
Your team now has the flag, so all you need to do is get back to your base and capture. There may still be defenders lurking around, so either frag them or get by them. If there are members of your team there, try getting them between you and the defender, so they can frag the defender for you, or take the bullet. While running the flag back to your base, you need to ask the Defense if your base is secure. You ask this to see if the enemy has taken over your base, if it is not safe for you to return with the flag, or if your flag has been taken. If this is the case then you need to make yourself scarce. You need to hide in less traveled parts of the base, maybe even grapple up in a dark corner and hide until your base is safe, or until your flag has been returned.
Misc. notes on offense:
The quad is a very important asset on offense. It is possible to take out a whole enemy defense with a Quad BFG (400 points of damage at the impact site). Therefore it is wise to have a member on your team camp or guard the quad for your offensive members. The quad will respawn exactly 60 seconds after it is taken. If a player on offense gets the quad, they should have a bind that says “quad in 30,” sent to their team exactly when the quad runs out. As always, when you have the quad be very careful of splash damage weapons as you can frag yourself very easily.
While you are on offense, it may be worth going out of your way to get a Tech. Techs can greatly increase your ability to frag or your longevity. Whenever I see the AutoDoc laying around, I would sell my soul to get it! Don’t be too greedy though, because sometime you can be walking into a really bad situation when trying to go for a Tech. For example, if there are 3-5 enemies close to the Tech, or if you see a lot of explosions near it, or if you see that an enemy will get it before you do, you will probably want to lay off of the Tech.
It is also a good idea on offense to frag an enemy seen or heard carrying a Tech. If the other team as any of the Tech, they may have a slight advantage over your team. It will be harder to frag these enemy players, so a slightly defensive aggressiveness is required. For example, go out to frag the player, but do so carefully, and use traps and ambushes around corners rather than charging in with guns blazing.
Defense Strategies
This section will lead you through some basic ideas of defense. For more advanced defense techniques, please read the Adv. Defense sections in this bible (coming soon!), and the Techs section. On defense your goal is to keep the other team from grabbing your flag. Defense is just as important as offense in a game – if your offense can get 20 caps, but your defense gives up 20 caps, all the work the offense did is for nothing.
Camping and Sniping
Camper!
First, if anyone accuses you of “camping” while you are on defense, ignore it, because you’re not camping, you’re just protecting the flag. The whole goal of defense is to protect your position and your flag so no one gets by you. This can include camping the Quad, because it is such a huge asset for your offense.
Sniper
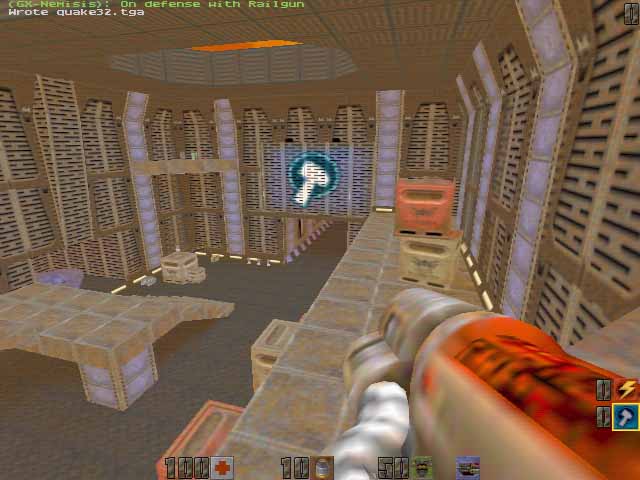
With the limited amount of resources combined with a large number of players, it may be necessary to use classes in CTF. One such class is the Sniper. The sniper is a player that is very proficient with the Rail Gun. This player’s job is to pick off enemies with the Rail Gun that are coming into the base, or near the flag AND warn the defense of incoming enemies. Because of this, the sniper must also be proficient in using “incoming” binds. Some maps, like Stronghold Opposition (q2ctf2), have a “sniper roost” built into each base. This section of the base is ideal for sniping incoming enemies because it overlooks a wide open area that leads to and from each base and it has an ammo pack of slugs. While you are sniping on this map you must be careful of enemy snipers, as the sniper roosts of each base face each other so you can yourself be sniped.
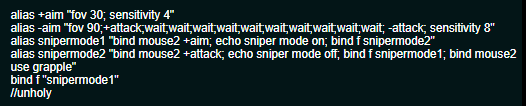
Here is a quick script to FOV snipe. Thanks to Unholy for this script.
Defensive Positions
Covering Choke Points
One defensive option you have is to position yourself so that you cover the choke points into your base. Choke points are narrow areas leading into your base that require someone passing through this area to go through your line of sight. This can be a hallway, a teleport, or a doorway. To cover a choke point all you have to do is frag any enemies that pass by you, or warn the rest of the defense that someone is attacking from your position. A good example of this is in McKinley Revival (q2ctf1). There is a very narrow pipe that leads into each base from the water. A defender covering this choke point would toss grenades or rockets down this pipe when they see an enemy coming through it or if they hear a person on their team yell “incoming”.
While covering a choke point you shouldn’t leave your position to follow an enemy out of your base. This is because the enemy player may be trying to lead you out of your position so that other members from their team can get by your position. This is another case in which the frag count may make you forget that you are on a team. Remember that it is more important that you protect your flag than if you get frags. From a strategic standpoint, not chasing after a player if you are protecting a choke point is the best idea, because the enemy is no closer to the flag after they encounter you, but they may be hurt from the process. The only time you should really follow an enemy out of your base when you are protecting a choke point is if the enemy is carrying your flag.
DM in CTF?
Another possibility on defense is what I call the “DMer”. These defenders stand near or on the flag and frag any enemies that come close to the flag, hence the name “DMer”. This player or players must also communicate with the rest of the team. They also need a “On defense at %l” bind, but they also need the “Base is overrun/not safe”, “Flag in danger” and “Need help on defense!” binds. These defenders need to coordinate the rest of the defense, as they have the best grasp of what is going on throughout the base, and also can see the flag the most. These defenders gain the most from having the Techs because they are the last line of defense of the flag, so they will need the highest ability to frag.
Defensive Communication
The most important thing you need to do on defense is communicate with your teammates. When you reach your position you should use a “On defense at %l” bind so that your team knows you are covering that area. This allows your teammates to get an idea of what areas are covered so they know where to expect enemies to attack. Next you need to use the “Incoming to flag” or “enemy seen at %l” binds to directly warn your teammates there are enemies attacking. Another useful bind in this situation is the “I’m am dead” or “out of position” binds, which tells your teammates that your position is overrun or no one is covering it. Finally, an important bind to use on Defense is the “Enemy flag carrier seen at %l”. This bind tells your team where your flag is so they can come help frag the flag carrier.
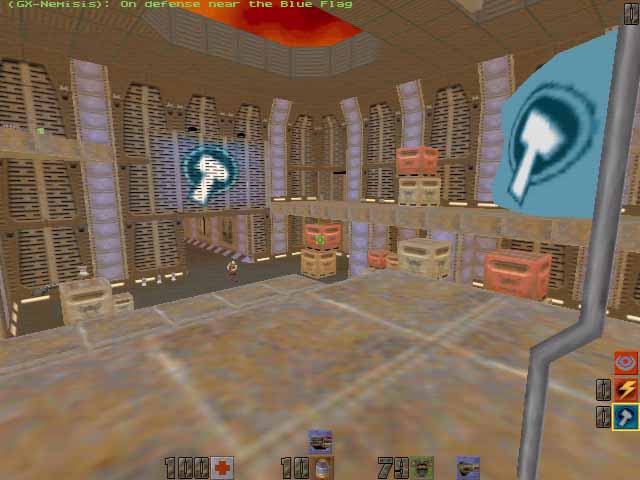
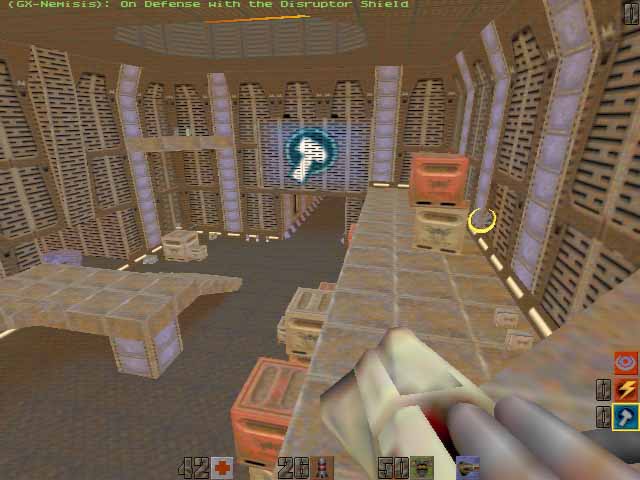
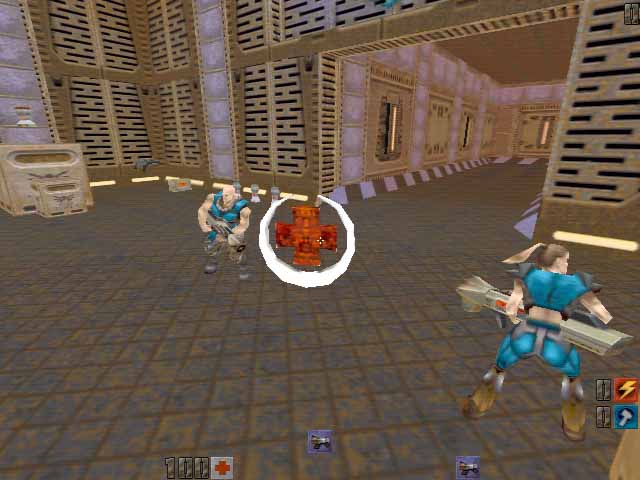
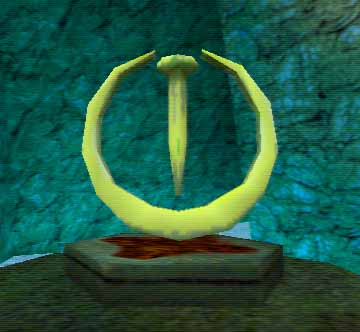
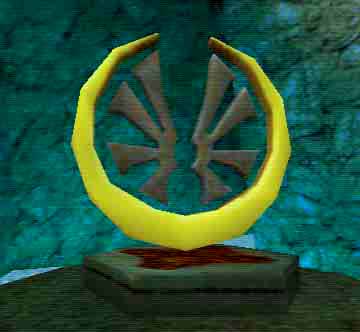
Introduction to Tech Power-ups
The Techs
The techs add yet another spin on CTF. These items enhance or add abilites so you can live longer, or attack stronger. If you ever come across any of these, grab hold of them and keep them as long as you can. The following is a brief description of each Tech. A section with a Asterick is an advanced section. These sections go deeper into the numbers and math of each tech, and also analyze some possibilities of thier use on offense and defense.
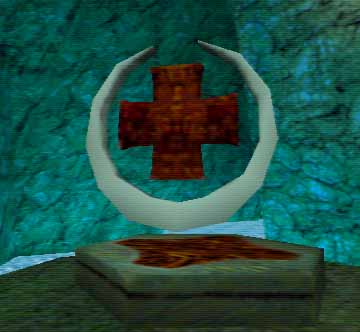
The AutoDoc
The AutoDoc replenishes 5 points of health and 5 points of armor per second. If you have full heath, then it will replenish your armor at a rate of 10 points per second. Your health will be continually replenished until it reaches a maximum of 150 points. If you get the MegaHealth while you have the AutoDoc, and have 150 health, then your health will go to 250, but will not diminish over time. You can still add stimpacks to 250 health points, but adrenaline will not add more.
All armor will be replenished to 150 points as well. Thus Green armor, which normally has a max of 50 points, will be brought up to a max of 150 points while you hold the AutoDoc. Yellow armor is also brought up to a max of 150 points. The maximum aromor points Red armor can have is 200 points (normal) but if it is brought down to below 150 points, it will only be replenished to 150. Do not confuse Armor with the Power Shield however, since Cells fuel the Power Shield, the AutoDoc does not replenish it.
A very powerful combination with the AutoDoc is Red armor, MegaHealth (for 250 health points) and the Power Shield. This combination of Armor/Techs/Items will make it incredibly hard for anyone to kill you.
AutoDoc: On Offense
At the Enemy Base
Before going on an offensive run, the AutoDoc should be shared among the squad. This saves time and resources for your whole team. One way to use the AutoDoc on offense is to give it to the player that will go into the enemy base, and try to draw out the majority of the defense. This player will be able to last in a firefight longer than the rest of the squad. While this player is distracting the defense, the rest of the offense squad should concentrate on getting the flag. Remember that you do not want to lose the AutoDoc, so the distraction player should know when to run back to his base or hide while he replenishes his health/armor when he’s in trouble.
Flag Running
The AutoDoc can also increase the life span of a flag runner. The player with the flag will most likely be the main target of the defense, and thus will need to regain health/armor the most. The instantaneous regeneration of health can be a real lifesaver (pun intended). I can remember all the times when I was about to capture a flag and someone respawned behind me and killed me with a blaster =]. Those extra few points of health were the difference between a cap and my untimely death.
I do have to stress that the AutoDoc is so powerful that you do not want to give it to the other team. Using it on offense, you literally walk it right into their base. Keeping the AutoDoc on defense is probably the best way to utilize it. Remember that all of the defensive strategies following can be used by the other team.
The Power Amp
The Power Amp doubles all weapon damage. This does not replenish ammo, so don’t get trigger-happy. There is a tendancy to use a lot of ammo when you have the Power Amp, mostly because it is fun watching your enemies gib with more frequency. You also need to be careful of your own splash damage; it’s much easier to injure yourself with rockets or grenades while you have the Power Amp. Sometimes you can get away with hitting someone with a point blank rocket, but with the Power Amp you will quickly learn not to. You should probably use non-splash-damage weapons when there is a high probability for hitting yourself. (I.e. don’t use the BFG when your enemy is right in front of you).
The Power Amp in conjunction with almost any weapon is deadly. One of the most deadly combinations is with the Rail Gun. Normally it is not easy to live through a Railgun shot, but imagine being hit with two rails simultaneously! For close range attacks the Super Shotgun and Chaingun will tear through your enemies.
Power Amp: On Offense
At the Enemy Base
On offense the Power Amp can decimate an enemy defense. Just like grabbing a Quad in DM, the Power Amp can send an enemy running.
The pointman in a squad (the one who breaks into an enemy base first) is an option for which player should hold the Power Amp. The pointman should go in with either the Chaingun or RL and try to take out as many defenders as possible, closely followed by the rest of the squad. As the pointman in the squad is engaging the defense, the flag runner should concentrate on grabbing the flag and getting out.
Power Sniping
Another possibility is as offensive sniper. As stated before, a Rail Gun with the Power Amp deals out 200 points of damage per shot. Thus on offense a sniper can sit in the back of the squad and pick off defenders with the Rail Gun. (If the base is a large room, grappling up to a concealed location works well)
In both of these cases, the person with the Power Amp should pay close attention to the status of the defenders. If a defender has the Power Shield or the Disruptor Shield, it would be a good idea to frag these defenders first. This is because the two effects of the techs (or power shield) will negate each other, so the defender with the added protection will be an easier kill for the Power Amp than anyone else in a given attack force.
Running with Scissors
Of course there is the possibility of giving the Power Amp to the flag runner. This is so that they can protect themselves while running for the flag or running away with it. Also if the escort teammates get fragged, it is good to know that the flag runner can hold their own in a fight. The flag runner will need to take notice of which weapons he uses with the Power Amp. As stated earlier, it is very easy to kill yourself from self-inflicted splash damage with the Power Amp. Weapons like the Chain Gun and SSG are good choices to couple with the Power Amp.
Power Amp: On Defense
At Home
For defense a great way to apply the Power Amp is to snipe with it, as described above. It can also be used by the defender that engages the majority of the incoming enemy. This defender will probably be an efficient killing machine without the Power Amp, and with it, the base should be next to impregnable.
Conserving Ammo
Having the Power Amp on defense is also a way to conserve ammo. The logic is that it takes fewer rounds to kill an enemy, thus a defender would need to break away from a fight to reload less. The ammo saved by one defender may not seem like much, but its main accomplishment is to allow the defender with the Power Amp to be more effective with less ammo. For example, a regular defender with only 1 rocket shoots and scores a direct hit, but the enemy is left with 20 health. The same defender in the same situation but with the Power Amp would have killed the enemy.
Shutting Down the Offense
You can also “close” an entrance to a base with this. By using rockets with the Power Amp and shooting them into a corner of a hallway or a small entrance, you can deter or kill any enemies coming in from that way. For example, in Q2CTF1 (McKinley Revival) the small pipe that goes into either base from the water can be closed off this way. Just stand at the top of the pipe and pump rockets or grenades into it if you hear a cry of “Incoming!
Time Accelerator
This doubles your rate of fire for all weapons. The Hyperblaster is the only weapon that does not fire at double the rate. Instead, it fires two blasts simultaneously, but at the cost of double the ammo.
With Time Accel, the rate of fire of the Railgun is comparable to the shotgun, making it extremely deadly. The RL and the Time Accelerator can supply suppressive fire second to nothing. With a lot of ammo just about any entrance can be effectively cut off.
The Time Accel is most effective when used to “plug” a hole. The increased rate of fire allows you to pump out a lot of rockets into a corridor or a small entrance deterring or killing enemies that try and run through. This is good for both defense and offense. On offense you can cover a hallway behind you as you are running/escorting the flag.
Time Accelerator: Usage
Weapons Choices
The Time accelerator also increases the usefulness of a sniper. The increased rate of fire with the Rail Gun makes a sniper even more deadly. You should practice sniping with the rail gun and Time Accel, because the increased rate of fire takes a bit to get used to. I suggest getting a CTF bot like CRBOT or the like and practice on your own comp. Sniping bots can be fun =]
When using the Time Accelerator, you need to be very careful with your ammo. Ammo usage goes through the roof with it. The Chain gun doesn’t last very long at all, as 200 rounds of ammo will be eaten up in just 4 seconds. Also remember that the Hyper Blaster doesn’t look like it is using more ammo, but it is actually firing two simultaneous shots instead of one.
The Super Shotgun’s usefulness is also greatly enhanced with the Time Accelerator. With the Time Accel, the doubled rate of fire make the SSG arguably the best point blank weapon. You can really mow down a group of enemies with this combo.
Offense or Defense?
The issue of using the Time Accelerator on offense or defense depends on situational modifiers. If the enemy offense is straining your defense, or even capping on your team, you will want to keep it on defense. However, if their offense isn’t giving your defense a very tough time, but their defense is hard to crack, then you will want to use it on offense. The extra boost from the Time Accelerator may give your offense enough to break the enemy defense.
Time Accelerator: On Offense
At the Enemy Base
On offense the Time Accelerator can be used just like the Power Amp. The increased rate of fire will help an offensive player take down a defense. Here are some possibilities of how the Time Accelerator can be used on offense:
The pointman in a squad (the one that goes in a base first) is an option for which player should hold the Time Accelerator. The pointman should go in with the Rocket Launcher or the Rail Gun and try to take out as many defenders as possible, closely followed by the rest of the squad. As the pointman in the squad is engaging the defense, the flag runner should concentrate on getting the flag and getting out.
The person with the Time Accelerator should pay close attention to the status of the defenders. If a defender has the Power Shield or the Disruptor Shield, it would be a good idea to frag these defenders first. This is because these defenders will be generally harder to kill, and with the Time Accelerator you have a better chance of killing them.
Sniping
Another possibility is an offensive sniper. On offense a sniper can sit in the back of the squad and pick off defenders with the Rail Gun. (If the base is a large room, grappling up to a concealed location works well) You can do this tactic without the Time Accelerator, but with it the effectiveness increases.
Power Flag Running
Another excellent tactic is to give the Time Accelerator to the flag runner. This is so that they can protect themselves while running for the flag or running away with it. Also if the escort teammates get fragged, it is good to know that the flag runner can hold their own in a fight. As with the Power Amp, the flag runner must be careful of which weapons to use. The increased rate of fire also increases the probability that you can injure yourself from splash damage. Weapons such as the Rail Gun, Hyperblaster and SSG are good choices in this situation.
Time Accelerator: On Defense
At Home
Again on defense the Time Accelerator should be used in a manner very similar to the Power Amp. That is you can use it sniping, or give it to the defender that sees the greatest amount of enemies.
Plugging Holes in the Defense
As stated earlier, “plugging” a hole with the Time Accelerator can be done by the defense. To do this you just have to get a lot of rocks, and shoot rockets into a heavily traveled corner of a hallway when your base is assaulted. A good example of this is on Q2CTF1, McKinley Revival. The pipe leading into each base from the water is very narrow, and very easy to trap players in. A defender with the Time Accelerator just needs to stand at the top of the pipe, and whenever he hears an ‘incoming’ or sees an enemy coming up the pipe he just pumps a few rocks or grenades down the tube, easy as that. Caution needs to be taken when your teammates are trying to pass through that area, however. An easy way to piss off your teammates is to take away all of their armor (or their life!).
Another good tactic to use is coupling the Time Accelerator with the Super Shotgun. The increased rate of fire from the SSG, combined with the instantaneous travel of its shot, plus the shot spread makes it extremely deadly. Thus when enemies are attacking you base, just let loose with the SSG. Try and get as close as possible, as the damage increases with every particle of shot hits. Again you need to be careful with team damage with the SSG.
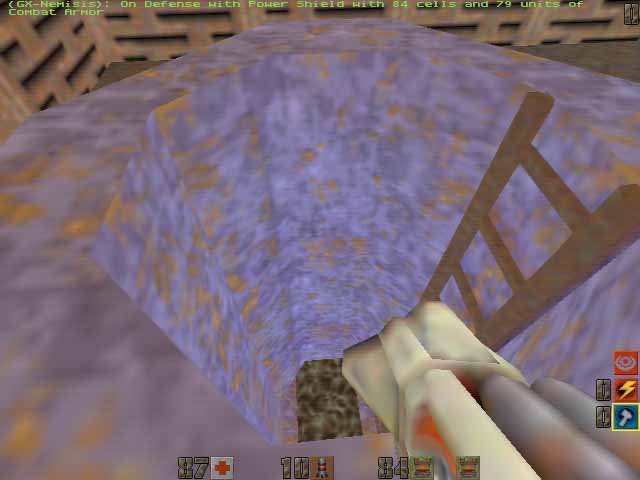
The Disruptor Shield
The Disruptor Shield halves the damage taken to both your armor and your health. The Disrupter Shield is just like having a Power Shield that doesn’t need cells and never deactivates. The Disruptor Shield’s damage capacity is tallied first when damage distribution is calculated.
For example, if you have the Disruptor Shield and get hit by a Railgun shot (100 points of damage), you will only receive 50 points of damage distributed among your health, armor, and Power Shield.
Watch out, as people tend to forget that they can still die when they have the Disruptor Shield. As Thresh describes when he talks about the Quad, “people tend to throw caution in the wind” when they have the Disruptor Shield. Realize that you can take a lot more damage, but as always keep a close eye on your health and armor.
Disruptor Shield: On Offense
The Man with the Ball
The obvious person to give the Disruptor Shield to on offense is the flag runner. The increased longevity of the flag runner will also increase the probability that he or she will make it back to your base alive. This is probably the most optimal offensive situation for the use of the Disruptor Shield.
That is not the only possibility for offense, however. Using the Disruptor Shield on offense is very similar to using the AutoDoc on offense. The pointman (the one that attacks the base first in a squad) can also use the Disruptor Shield. This is so that the pointman can take out and/or distract the enemy defense while the rest of the squad is working on getting the flag and getting out. This pointman would focus on luring the defense away from the flag or even feint for the flag as to draw them away.
Disruptor Shield: On Defense
The Front Man
On defense the optimal usage of the Disruptor Shield would be giving it to the defender that sees the largest amount of incoming enemy. This defender will most likely take the most damage compared to the rest of the defense, so the less damage taken by him or her, the longer he or she can stay at that position. There is a benifit in staying at your position longer. Murphy’s law kicks in a lot in CTF, ‘The enemy will attack when you are least prepared,’ So the longer you stay in your position the lower the probability that you will be out of your position when the enemy attacks.
Just as a reminder, take caution to your health and armor when you have the Disruptor Shield, as people tend to forget that they can still die when they have it.
Introduction to Flag Running
The Art of Flag Running
Flag running is an art. Some may think it is only a game, but the sheer amount of skill and experience required to be an excellent flag runner pushes the boundaries of CTF to a new level. Like anything done at a professional level, the best competitors rely on a mix of rational thought and instinct to be the best. This guide will help you learn both.
Starting Off
Gathering Supplies
When you are on offense and you spawn into a game, the first thing you want to do is get supplies. Attempting to go into an enemy base and stealing their flag with only a blaster is less than futile. Make sure you grab a weapon or two, preferably one that can kill quickly (i.e. a Rocket Launcher, Rail Gun, Hyper Blaster), and plenty of ammo. It is important that you stock up on armor as well. Many people tend to forget that armor increases your longevity in a firefight, especially facing a defense that may have the aid of one or more tech Powerups. A Rocket Launcher with 15 rockets, a Rail gun with 10 slugs, 75 points of armor, and full health are a good minimum of equipment before attempting a flag run. If the enemy defense is tight and you expect heavy fire to get the flag, you should also get the Power Armor with at least 150 cells, 100 points of Red Body Armor, and the MegaHealth. A Tech will also help you a lot, but remember that when you are on offense with a Tech you run the risk of bringing the Tech right to the enemies.
Spawning in the Enemy Base
If you happen to respawn in the enemy base, you can do 2 things: you can try to escape, rearm, then come back to try and get the flag, or you can rely on your grapple skills (and luck!) to get the flag out. There is also a chance that the rest of your offense could be attacking at the same time you respawn in the enemy base. If this is the case it would be a good time to become part of their squad again and help them. You may not want to assume the role you were previously with them, i.e. if you were the designated flag runner you would not want to be that when you have no armor/weapons. If you are very good at grappling, you make yourself a much harder target for enemy defenders. It may even be harder to get out of the base and come back than it is to grapple your way to the flag and out. My advice is to just try it, because if you die and respawn back in your base, you are actually better off than if you are in the middle of their base with no armor or weapons.
Getting There is Half the Fun
Choices
Now that you have weapons and armor, you need to get to the enemy base. This is where knowledge of the map becomes tremendously useful. In all of the CTF maps (the maps that came with the original patch), there is more than one way into the enemy base. The “main” entrance into a base is the one that is easier to access, and will have more people coming in and out of it. Going into an enemy base this way will lead to more encounters with the enemy, whether they are going into their base to return to defense or if they are enemy offense going towards your base. Getting yourself into the enemy base through this entrance is faster in the sense that it is more direct, but this path will also lead to more encounters with the enemy. These fights will deplete your ammo and armor, and you may even be fragged before getting into the base. The main entrance will also be more likely to be covered by a sniper. Running into a base, fully decked out and ready to rumble just to be railed the second you step into a base is not the ideal offensive tactic.
The Main entrance differs from the secondary or tertiary entrances as the secondary and tertiary entrances offer less encounters with the enemy, but take longer to get through. Remember that some secondary entrances, it is possible to drown in while navigating the water. Since there is only a small chance that you will encounter an enemy while you are passing through this entrance, you will most likely pop into the enemy base with all of your ammo and armor, plus you will be deeper into the enemy base than if you entered through the main entrance. A good tactic is to grapple your way through the non-primary entrances, which reduces your travel time, and reduces the change that you will have to fight with an enemy.
Teammates
A good tactic is to have a squad attack the main entrance of the base, while you as the flag runner sneak around through a different entrance. The defense will be busy defending the base against the squad, while you can sneak in and take the flag. Once you snag that flag, don’t be surprised to see the brunt of the enemy attack turn to you, however. This is the chance for your offense to both strike at the enemy and protect you from harm. For a more detailed description of this see the Adv. Offense section, coming soon.
Going by Defenders
So now you’re in the enemy base ready to get their flag. But wait! There are defenders in the base, and they don’t look too happy to see you! You’re probably thinking “Damn I have to kill all of these guys to get their flag????” That is a possibility, but not the only option. A lot of people think that you need to take out the whole enemy defense to get their flag, but that is not true. To get the enemy flag all you need to do is out-smart the enemy defense.
Compromising Positions
This brings up the concept of “compromising the enemy’s position”. This is a bit complex, but once you understand it its very easy to think about. A basic example is attacking a hill. If a person is defending the hill from above, they have the advantage, while the person attacking from the bottom has a disadvantage. If the attacker can get above the defender, he has compromised the position of the defender. Another example is a defender protecting the flag. As long as the defender keeps himself between the flag and the attacker, he has the advantage. This is because the attacker’s goal is to get the flag, and as long as the defender is in the way the attacker cannot accomplish his goal. Since the defender knows this, he has the upper hand because he knows where the attacker is trying to go, and can prevent him from going there. This happens a lot when people don’t realize it. When you are fighting someone and you both start circle strafing, as soon as the attacker has his back to the flag, he should break off the attack and go for the flag (as long as he knows he can get away without the defender fragging him).
So while you are flag running, you should keep the idea of compromising positions at hand. While heading for the enemy base, if you come across their offense while they are attacking your base, the best thing to do is attack them until you have compromised their position (you move between the enemy attacker and the enemy base). At this time you should immediately break off the attack and keep heading towards their base.
Advanced Grappling Techniques for Flag Running
The Art of Grappling
The grappling hook can be your greatest asset when trying to steal the enemy flag. The ability to fly through the air and the increase to your movement rate is a definite advantage when going for the flag. The disadvantage to using the hook is the lack of a weapon. Remember that you cannot use a weapon with the hook (unless you are suspended on a wall) because the hook itself is considered a weapon. Since you cannot use weapons with the hook, you should equip yourself with plenty of armor, and the Power Shield if possible.
A few techniques should be practiced thoroughly before attempting them in an important game:
- Stand a good distance away from a wall. Hook onto a high part of a wall, while you are half way (vertically) to the point of which you hooked, let go. You should arc through the air and land at the base (or close to) the wall.
- Hook somewhere and let yourself be pulled towards it. Let go in the middle, you should start arcing or falling down(depending on your trajectory and height), but your forward velocity should not change (unless you run into something) . Now hook towards another area. As soon as your hook connects you will immediately be pulled towards it (the physics are not correct, but oh well).
- Hook to a high part of a room, and let go when you are almost at the top. Now immediately hook straight down. You will be pulled toward the ground and land, but as long as you keep the hook on (+attack) you will not receive any fall damage.
- Feigning the hook also works. Run into a room and shoot the hook somewhere. Before it connects or before you are pulled towards it, let go of the hook and shoot it somewhere else. Some people may start shooting rockets or grenades to where you shot the hook the first time (because it is hard to shoot someone in mid air ), but you will be traveling to a different part of the room.
Randomize
The most important thing to do while you are using the hook is to make sure you are random. This means that you randomize the amount of time you hold the attack button down while you are flying through the air, and randomize the locations you shoot the hook to. This randomness can also be considered a unpredictability in your shots to throw off the defenders. For example, you can run into a base, shoot your hook at the ceiling, fly halfway up, let go (you will still fly up until gravity stops your upward velocity) hook to the wall behind the flag, fly towards that, and let go so you will fall right onto the flag. This is actually a very, very simple example of using the hook to get the flag.
You can use many combinations of hooking to confuse the enemy defense and get the flag. I have seen games in which the flag runner did not touch a single defender, but still managed to get out of the base with the flag by only using superior hooking skills.
Escaping from the Enemy Base
Get out!
Now you need to get out of the enemy base! First you need to see how many defenders are still in the enemy base. If there are none, you’re lucky, and can just exit. More likely, there are defenders left in the base, and you will need to decide if you can/will frag them, or if you will just get around them. You need to base your decision on how much armor/ammo/health/weapons/techs you have, how confident you are in fragging them, what kind or weapons/techs they have, how many of your teammates are going to escort you, and how fast you can get out of the base if you do or don’t kill them. That’s a lot to think about. I wouldn’t worry too much about all those things, because while you’re sitting there trying to decide a defender may come by and frag you. You need to make your decision quickly because the longer you spend in the enemy base, the higher the probability the defense will descend upon you.
Again, while you are running back to your base with the flag, you should keep the idea of compromising positions at the top of your head. It is exactly the same as when you were running into the base, except you are now running out. If you can get yourself in between your base and the enemy, you have the upper hand.
Choose your path wisely
This is a case in which taking the secondary exit will probably be better than the main entrance. If you go out the main entrance, there is a high probability that you will run into enemies who saw that their flag was taken, and are trying to get back on defense. However there is less of a chance that there are enemies coming into the base through the secondary entrance. Also, on the majority of the CTF maps there are few or no respawns on the path leading from the secondary entrance. So if you exit this way, there will be less of a chance that you will run into enemy resistance. Using the hook to travel through the secondary entrance/path is a good combination, as the extra speed provided by the hook plus the fewer enemies will make getting out of the base easier.
Running Backward
The Art of Running Backward
This technique takes a lot of skill, experience, and patience to master. The basic idea of running backward is, of course, running with the flag backward. Why would you want to do this? Statistically as soon as you are out of the flag area or enemy base, the majority of enemies that are a threat to you are chasing you from behind. Running backwards allows you to see the enemies and where they are shooting, and allows you to return fire. If you know where the enemies are and what they are trying to do you have an advantage over them, as you dictate where they are going to since you have their flag. This also helps because you can cut down on the number of enemies following you by fragging them yourself.
Patience…
Learning to run backwards takes a great amount of practice, practice, and more practice. To start off you should run any of the CTF maps on your own computer, with no one connected. Choose a team and go to the other team’s base. Now get the flag and practice running backward the whole way back to your base. You may find yourself running into a lot of walls or falling off ledges. You should try “feeling” your way through the bases at first, i.e. strafing against walls and doorways to get used to running backward. With time you will be able to do this on any of the maps without running into any walls, killing yourself falling into lava, or even having to wall strafe.
The next step is to hop on a public server that doesn’t have too many people on it, and try it there. This situation will allow you to practice while there are people shooting at you and it will give you a feel for what it will be like on a crowed server.
Remember grasshopper, practice makes perfect, and practice does not come without patience. Keep practicing and perfecting your skills and you will become a natural. Remember not to rely on running backwards – it’s useful in certain situations, but if you aren’t looking where you’re going, you’re bound to run into something unexpected, whether it be the enemy offense, or straight into a battle between the two teams. Use it as a tool, not a dependency.
Capturing the Flag
So now the hardest part is behind you. Getting out of the enemy base is usually harder than getting back to yours. The first thing to do is see if any enemies followed you out of their base. If so, you or your teammates will have to frag him. This is one case where losing the chaser is not very easy, so fragging them may be the only option (this does vary with maps or course). While you are running back to your base it would be a good time to pick up some ammo, armor, and especially health. Most likely you took a pretty good beating while getting the flag, and it would be a shame if you died from someone respawning and hitting you with a blaster. I wouldn’t go out of the way to get health, but make sure to pick up anything that is easy to get.
Communicate
While running back to your base you need to ask your team’s defense if your base is clear. If there are enemies in your base, you will probably not want to go running in there with their flag. They will probably turn their guns towards you so they can return their flag. If this is the case you need to hide with the flag. Hiding can mean finding a dark corner and grappling up into it, or it can be running around in the back parts of your base where there is little or no traffic. If you feel confident enough, you can go help your defense clear your base so you can capture.
If you are sitting in your base with the enemy flag waiting for your own flag to return, your defense should protect you instead of protecting the flag position. What this does is turn your defense into a static flag escort. You may want to position yourself where your flag returns, as this is the position the defenders are the most skilled at defending. In general the flag return position also gives you the largest field of view that allows you to see incoming enemies, plus the defense has binds made to warn of incoming enemies to that position. Also, with your flag taken, enemy troops will be more busy looking for you than trying to storm your flag position specifically.
Capture!
So now that your base is clear, and your flag is in position, GO CAPTURE!!! Good job! That wasn’t easy!
Introduction to Advanced Offense
This section is probably the hardest section to apply to a CTF match because all the techniques described here require multiple players and a lot of practice to learn. Some of the practice may even require you to run “drills” just like a football team. Most of these techniques you will not be able to learn while playing on a public server, even if you are playing with your regular teammates. (Excuse me while I delve into some theory).
Defense Theories
One of the inherent qualities of Defense in CTF is that it is reactionary. It reacts to a situation brought to it instead of bringing an action somewhere else. For example, when you are driving a car you react to the stoplights at an intersection. The stoplights don’t react to what you tell them, but they tell you what to do. In CTF if a defender is defending the flag, he will wait around the flag area for an enemy player to come and attack him. He doesn’t know when the enemy is coming (typically), so he just reacts to the enemy when necessary. Because of this, the Offense is the party that dictates the action in a confrontation. The offense tells the defense when they need to fight, and how many they need to fight. This is probably the biggest advantage the offense has, and thus needs to exploit it the most. The offense can tell a defender “you are going to fight 3 people at the same time” and the defender will be forced to react.
Grouping Into Squads
Group Theory
Grouping is a way to gather forces together before attacking a base. This may sound easy but can be very complicated. The basic idea is to gather a squad of 2-4 people somewhere on the map and then attack the enemy base together. Attacking in a group is superior to attacking one at a time for several reasons — attacking in a group allows you to carry more firepower into the enemy base and allows you to cover the other members of the squad while you are attacking. Also, the defense will need to focus on more than one target, and each player will probably last longer in the enemy base as the damage is spread out among the squad.
Any defense that is worth a damn will set up so that it is like a “gauntlet”, that is, it sets up so that there are layers of defense to get through before an enemy can get to the flag. What this does for the defense is allow any one layer of defense to falter without worry because there are other layers of defense there to take up the slack.
Consider a defense set up completely around the front entrance. This may make the front entrance nearly impossible to get through, but if just one enemy slips by the flag will be taken since there is no defense there. A good defense will have forces at more than one point of their base.
How does this affect offensive grouping? A simple explanation is that a group of enemy offense will have a greater chance to get through layers of defense than a single player. If the offense sends people in one at a time, the defense will be able to put up its layers of defense and will be able to defend against the single offensive players.
Problems with Grouping
Never without a catch
Probably the toughest aspect of grouping is the pace of the game. CTF games can be very, very hectic, so trying to go somewhere and wait for your teammates to arrive can be very difficult. When you are waiting you can never be 100% sure when your other teammates will arrive, or if any enemies will show up at your location. The squad members need to learn patience when they are grouping. A good tactic is to secure the immediate area while waiting for other members. Also the squad leader needs to learn when to call the squad to go, because sometimes players just won’t be able to reach the meeting spot for some reason. An experienced squad leader will know when to give up on waiting for a player and advance to the enemy base.
Another problem with grouping is the lack of armor/ammo on most maps. If you have a squad of 4 people, it may take a while for everyone to get some armor and decent weapons. There are a few remedies for this, one thing you can do is cut down the size of the group. If there are only two members in a squad then it is much easier to wait for just two people to meet instead of four. Another option is for every member to not fully arm when they meet, and pick up armor/ammo on the way to or in the enemy base. This is somewhat risky, because the squad may run into enemies on the way to the other base while they are not prepared.
Squad Formations
Watch my 6
This may be somewhat misleading. While playing CTF online it would be nearly impossible to have your squad in a formation and holding it while they are moving. CTF squads aren’t quite like the Blue Angels. You can’t really do V formations or echelons or anything like that. “Squad formations” simply refers to the weapons and roles the members of a squad have.
One of the prominent advantages to attacking a base in a group is the ability to give cover to the other members in your group. For example, the first person in the squad to enter a base doesn’t need to worry about an enemy coming from behind him because there are people covering his back for him. In the same vein, the members following the point should be concerned with watching his back, and helping him out in any way they can with enemies in front of the squad. It would be a good idea to have the best railgunner at the position directly behind the point man. This allows the railgunner to have some cover at his front, and also allows him to pick off targets if the enemies are attacking the pointman. You probably wouldn’t want to be using a rocket launcher or grenade launcher at this position as you may hurt you or your teammates easily (if team damage is turned on).
It is really important to remember to not get in the way of your squad members while you are attacking a base. Don’t try to take a kill from someone and only shoot when you’re sure you won’t hurt your teammate. When there are four of you in close quarters it may be easy to send a stray rocket at your teammate.
Attacking With Multiple Squads
The more the merrier
Attacking with multiple squads is when the offense attacks with more than one squad! (obviously). This has some advantages over attacking again and again with just one squad. Say you attack with 3 groups of 3 instead of one group of 6. There is less of a chance that you will hit your own teammates in a group of 4, which can be a big problem in a group of 6. There is less time to wait to form a group of 3 than it does 6. The following pages are different types of multi-squad attacks:
Wave Attacks
Attacking in Waves
Wave attacks are when you separate the offense into 2 or more squads, and you attack a position with some time in between attacks. What this does to the defense is decrease the amount of time they have to reorganize and reload before another attack takes place. This can sometimes work better than sending in your whole offense at once because by the time your offense is all ready, the defense will also be as prepared with the ammo and armor. The constant pressure of attacks can sometimes break a solid defense.
The easiest way to accomplish this is to have one meeting place for all the offense. Instead of waiting for all of the members of the offense, you cut it off at about 3 people. As soon as 3 people are at the meeting place they go and attack the base. This then is repeated with the next 3 people that arrive at the meeting place. This natural delay in time forms “waves” of attacks at the enemy base.
The difficulty in this strategy is the unpredictability of when the offense members will arrive at the meeting point. It is quite possible that someone could meet in a group, attack the enemy base, die, and meet at the same spot again before a different member even makes it to the meeting spot once. In other words it can be very difficult to keep a steady stream of attacks because of the nature of the game.
Attacking on Two Fronts
Attacking on Two Fronts
A two-front attack is when the offense attacks a position with more than one group from different sides. What this does is it allows the offense to swarm in on a position while at the same time increasing the area of attack. Just like a real war the defenders are at a disadvantage when they have to fight on two fronts. This will probably mean that the offense will lose less players in the initial attack, and will be able to go in deeper into the enemy base with a larger group.
The location to attack the enemy defense with two squads depends on the map, and will also depend on where the defense sets up. For example on Outlands II (q2ctf4a) if the defense sets up at the narrow entrance to their base (both bases have a narrow entrance, the small tunnel in Red base and the long ramp in Blue base) a good way to attack that position with multiple squads is to send one group through the water, and the other in the front. More than likely the defense will have to back up into their base a little. As they back up the squad that entered the base through the water will be there to greet them. After this attack the offense can go onto attack the flag area.
Coordinating two-front attacks is tricky. First the two squads need to meet them selves, and then they need to have the proper timing so they attack a position at the same time. Perfect timing is nearly impossible in the middle of a game. There are some things however, that you can do to get close. First the squads will want to meet in different areas. Usually the squad that is going the longer route will want to meet closer to the intended attack position. Both squads need to keep in constant communication with each other. The squad with the longer route should be the squad to call the attack. A few seconds before they arrive at the attack point they should single to the other squad that they are in position to attack. Since the other squad has a shorter route, they should be able to reach the first squad at generally the same time that they attack (assuming they meeting positions have adequate distance to do this, if not the second squad will need to be singled to go earlier).
Another way to coordinate this attack is to transform the wave attack described above. Send the first squad to the longer route, and the second squad goes through the shorter route. Hopefully the second squad will attack at the same time as the first one just arrives. This method requires a lot less effort to coordinate, but at the cost of precise timing when attacking.
The disadvantage of this tactic is that it requires an enormous amount of practice and experience by all members of the offense. Each member needs to have a feel for the timing of attacks, and each needs to be able to follow orders closely. However, if you can pull it off, it will take the stoutest of defenses to stop it.
https://web.archive.org/web/20000823040823/http://www.gamersx.com/quake2/q2ctf/
Thresh’s Frontline — Daily Rant

Thursday, October 21, 1998
[1:36 AM]
Oops, slipped a little bit. Before I add to the original update, I thought you guys might find this interesting. Alice decided to write a lil’ commentary on how she thought the trip went. :) I thought it was interesting hearing it from a “Girl’s” view. Hee hee. Anyway, here’s her writeup:
I had the unique opportunity of tagging along with Thresh to London. My recollections of London are a bit different from Dennis’ because I had a bit more time to poke around, while the poor guy was stuck interviewing hour after hour. I wouldn’t say that I was a completely useless travelling buddy, but I have to admit that I might have caused him more pain than relief. Oops! Well, let me start from the beginning.
To start off, Dennis and I weren’t able to sit together on the plane because we made our flight plans so late. Dennis ended up in business class, while I ended up in economy. Being such a gentleman, Dennis offered to switch with me, but I didn’t think it was such a big deal. Then again, I haven’t been anywhere far in a while. I was just so happy that I was going to London! (Thanks to Wireplay/AMD who made it possible!) Anyhow, it was a 9 hour flight and my legs, neck, back, etc. were killing me. Getting off the plane was like a scene from the Titanic. The upper class guys get off first, then the peasants. I see Dennis at the end of the hallway and he looks fresh as a spring rose, I needed a hot shower…but what the heck! I’m in London! :)
The next morning, we loaded ourselves up with coffee to get ready for a long day of interviews. Dennis’ first interview was at a purty popular radio station, and we bumped into the Jurassic Park guy on his way out. I don’t recall his name, but he was the old man who owned the park. Anyhow, that was about it for our star spotting experience…no Tom Cruise or Sean Connery…only the Jurassic Park guy, but I thought it was just as cool anyway.
After that, we headed on over to The Playing Fields where we were met with great hospitality. Since Dennis was obsessing over Shepherd’s Pie and Beef Wellington, one of the owners of The Playing Fields, Charles, recommended to us an authentic English restaurant. We actually ended up going there, and it was a great place, but no beef or pie, just duck and lamb. I think London has this thing for great restaurants on small, dark, unlit streets.
So Tuesday was our day off. Like Dennis said, most of the day was spent trying to get over the jet lag, but it didn’t happen. Anyhow, the fun didn’t start until dinner. We go to this fancy smancy restaurant near the theater, and I order a glass of wine. Everybody in London drinks wine, so why not? By the end of dinner, I’m like, “Dennis I think I’m going to throw up.” So I get up to the reception desk and ask the lady, “Where’s the restroom?” Before she’s able to tell me, I start blacking out and tell her I’m going to throw up. She hands me the trash bin, and I start yacking away. Picture this, I’m all dressed up ready for the theater, sitting in a chair in front of reception with my head in the trash can, throwing up in front of all their guests. Somehow, I make my way to the bathroom, but in the meanwhile, poor Dennis is getting all these dirty looks from the staff outside. Luckily, he had already paid the bill, so we hung our heads and made our way out. So, you think it stops there.
We get to the theater and I’m feeling all fine and dandy, eating Malteasers (=Whoppers, but better) and all sorts of junk, when half-way through the show, I want to throw up. Poor Dennis takes yet another hit, and scoots people out of their seats during the show so that he can lead me to the bathroom. So I throw up the rest, and that’s pretty much the end of my trouble making for the day. I have this theory that I was food poisoned, Dennis thinks I’m a lightweight, but we’ll never know.
On the day of the event, I met some guys from the quaking scene, however, I think there was a lot more partying going on than gaming. D2-B2 and Makaveli would’ve loved it! Hey, we were thinking about you guys. It was held at the biggest night club in London, 300 showed up to watch the matches and about 700 were there at one point. Not much I can say about the matches because I’m sure you all saw the demos, but everyone was a real good sport, and there was lots of free beer to keep things going. None for me tho, thank you. :)
I didn’t get to see Buckingham Palace or London Bridge, but I’m glad I got to see the London gaming scene inside out. It was lots of fun, and I have James/Wireplay/AMD to thank for such an awesome experience. Thanks to all the folks who took care of us while we were in London, James, Chris, Adriane, staff at The Playing Fields, John, Sandy, Elizabeth, and Jackie.
Most of all…THANKS THRESH!…heehee…strange calling you that. :)