

![]()
KT-imPAKt Maps
KTDM1, KTDM3, KTDM5 and KTDM7 authored by Martin “Killer” Kilcoyne •
KTDM2, KTDM4, KTDM6 and KTDM8 authored by Andrew “Thanatopsis” Palmer •
Varied map sizes (from 2-4 players to 4-12 players) •
Varied map themes (sandstone, metallic, waste and mine)
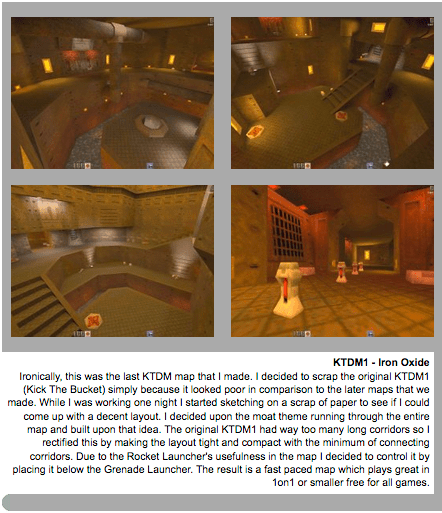
KTDM1 – Iron Oxide |
 |
Level Description
The first map of KT-imPAKt is a relatively small one which is best played with 3 – 6 players. However, because of it’s small size and good connectivity, one-on-one is also recommended. There are plenty of weapons but I have omitted the BFG10K and HyperBlaster to keep the map balanced. There are only three main areas and these are described below.
Playing Plan
The three main rooms in KTDM1 are very unique and there will be no mistaking where you are when you spawn. There are a lot of different routes through this map due to the multiple exits from each room on multiple levels. This may make finding a good route to achieve maximum frags a bit tricky.

KTDM2 – The Boilerhouse |
 |
Level Description
Quite a small level best suited for 2-6 players although probably the most fun with 6. There are really only three areas you want to be in but there are a couple more rooms worth a visit now and then. The action on the level is strictly focused around the lower areas where the rocket launcher and red armour both reside so you have to decide whether to risk the violent lower areas or to snipe from above. Decide how you’ll be playing, tool up and get to it.
Playing Plan
Small levels tend to only take a small amount of time to learn the layout of and The Boilerhouse is no exception. As with most maps, the best way to learn them is to stick in a few bots and get fragging. You’ll know the layout like the back of your hand (yawn) in no time at all and will soon be running around like a drugged up 100m sprinter.
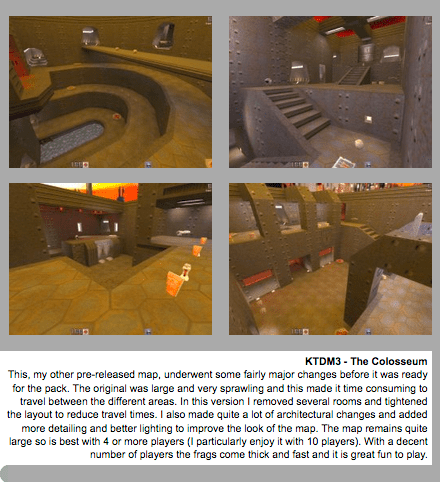
KTDM3 – The Colosseum |
 |
Level Description
KTDM3 is quite a large level with six rooms and therefore should be played with at least 5 players. I think it is at it’s best with around 10 players. All the weapons are in there including the devastating BFG10K and also the HyperBlaster. The majority of the action is in the main Colosseum as you would expect. You will want to try to be in this area about 60% of the time, leaving occasionally to pick up some health or some more weaponry and ammunition.
Playing Plan
Because the map is fairly large you may find it tricky to navigate at first. As always, exposure will breed familiarity so stick some bots in and you should learn the layout soon enough. After a while you should not find it hard to know which exits lead to which rooms. There are not many t-junctions in the corridors so that makes things easier. Also, all the spawn points are in rooms, none are in corridors. All the rooms look distinctly different so this should make navigation quite simple.
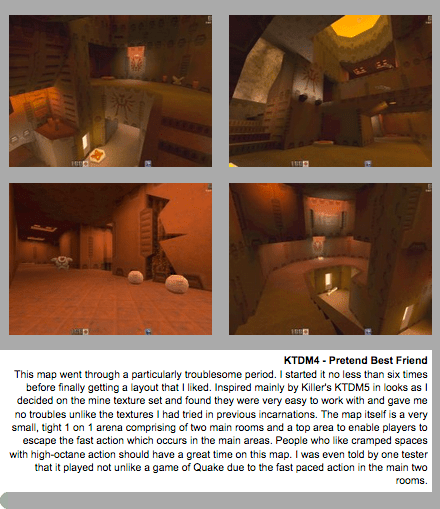
KTDM4 – Pretend Best Friend |
 |
Level Description
A very small level which starts choking at any more than four players but 1on1 is where you will get the most enjoyment. There are just two main rooms on the level although another area of importance is most definitely the zone at the top of the level. Be prepared for shock attacks as your opponent may be able to deceive you into thinking they are somewhere when really they are sneaking up behind you with the super shotgun. So, what are you waiting for? Strap up your boots, pull on your best armour vest and get ready to take your date on a trip they’ll never forget. Oh, and if you want a bit of help then you might as well start off here.
Playing Plan
As the smallest level in the pack you should have it’s layout nailed in a within a couple of minutes of playing. There are just five weapons on the level so remembering their placement shouldn’t be too troublesome either. Finding a way to play will be the only thing that should really worry you on the map… apart from the other player(s) of course.
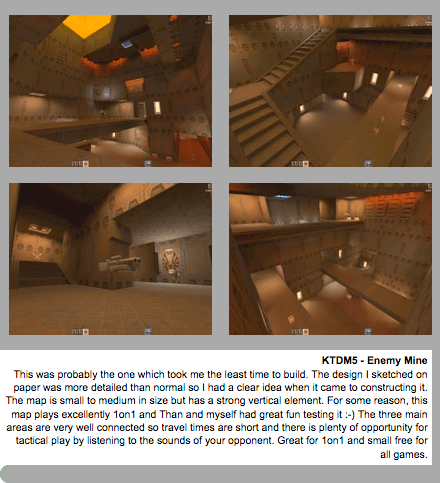
KTDM5 – Enemy Mine |
 |
Level Description
KTDM5 is one of the smaller maps in the pack and is ideal for both one-on-one and small free-for-all games of up to about 6 players. It consists of only 3 main rooms which are basically split on three vertical levels. There is a varied arsenal at your disposal with the exception of the mighty BFG10K, show-stopping HyperBlaster and puny Shotgun. Deathmatches in KTDM5 are likely to be fast and bloody due to the good connectivity and small size.
Playing Plan
The small size of the map should mean that you are familiar with the layout within a matter of minutes. You can get to any room from any other room at any of the three levels (with only one exception) so this makes for some good opportunities to cut off an opponent. There are plenty of weapons to grab so you should read the next few paragraphs for the best ways to make the most of them.
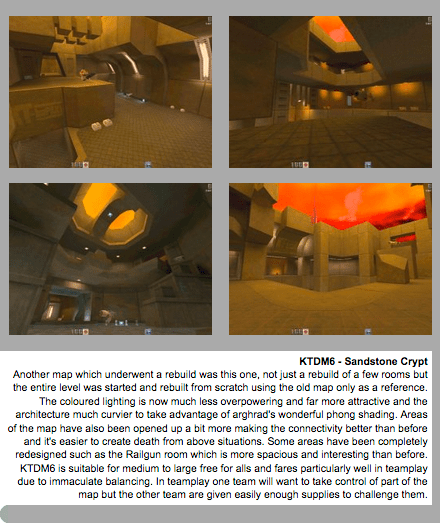
KTDM6 – Sandstone Crypt |
 |
Level Description
This is a reasonably large level and should be played with a minimum of four people so get a few people together and get going. The map consists of six or seven main rooms with several other smaller areas dotted about. All the weapons are included except the almighty BFG10K and there should be plenty of ammo to support a large playerload. Many of the rooms are linked together by lots of different areas and passages so getting about shouldn’t be a problem.
Playing Plan
This level should not prove particularly difficult to get to grips with because each room looks different from the others. the only reason you may have trouble finding your way around is because the level is quite large. First, to learn the level, you should load it up and take a walk around for a few minutes, but putting bots in to play against helps you learn much faster.

| KTDM7 – Silicon Avatar |  |
Level Description
Although KTDM7 is a relatively small map it is not ideal for 1-on-1. In fact it is best with at least 4 players. As usual in small maps I have not included the BFG10K or HyperBlaster to prevent easy domination of the map. Plenty of vertical space means shock free fall attacks from dizzy heights are a regular occurrence. There are four main areas and these are described in more detail below.
Playing Plan
The map is fairly small but very well connected so navigating might cause you a few small problems when you first play the map. The rooms are all unique in appearance and the connecting corridors are very short so you are unlikely to have problems once you know the layout.


KTDM8 – Rage Against the Machine |
 |
Level Description
A strange level with an odd layout. Much of KTDM8 consists of corridors passing through areas at different heights with a few main fighting areas containing the good stuff (ie weapons). The level can be played 1 on 1 but more players are definitely recommended and the level really starts to fill up at about 10 players. Wind chutes are the main form of vertical transport so watch out for campers waiting to pick you off when you emerge.
Playing Plan
The layout of this map is quite strange in places so it may take some learning before you know everything there is to know about it. Unfortunately, bots aren’t the best on this map as they have problems navigating the wind chutes so it looks like it either straight online to play or a lonesome trip around by yourself.

https://web.archive.org/web/20010108033900/http://www.planetquake.com:80/quartography/
