

Loki’s Missions: Escape by Mr. White, Der Kommissar, Vampire
Description:
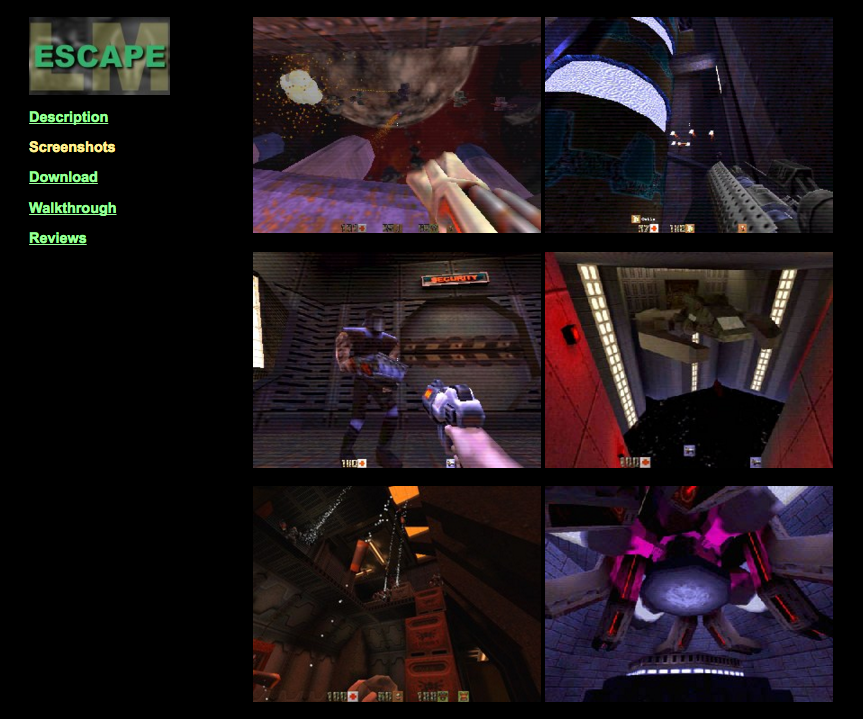
Escape is a single player adventure for Quake2 containing 6 customs maps, new sounds, textures and cinematics. The lmctf plasma rifle makes an appearance. It fires in 2 modes; spread and bounce. There is also a new type of soldier called the plasma soldier. He comes in 2 varieties; 1 firing a bounce plasma rifle and 1 firing a spread plasma rifle. His model is the same as the other Q2 soldiers but you can identify him by his blue and black skin.
The Story:
You are the only member of your platoon to be captured alive. You have been imprisoned on a Strogg space vessel on it’s way to Stroggos, where you will most likely be turned into food. As luck would have it, you’re able to overpower a careless guard in your cell and take his blaster. This is where we begin. What comes next is up to you. Good luck, you’ll need it.
Authors:
Mr. White, Der Kommissar, Vampire
- Planetquake Mod of the Week – “Very addicting, very hard, and very phat. A MUST play.”
- 3D Map Realm – “. This is excellent work, rivaling everything else out there. If you’re a fan of SPQ2, you absolutely cannot go without playing this. Get it now! “
- The Quake Industrial Complex – “Don’t miss this one, you’ll be missing out on one of the best multi-level missions designed for Quake 2.”
- Planetquake Interview – It’s not a review but it’s a great interview with myself (Mr. White), Der Kommissar and Vampire.
Walkthrough:
There are definitely some spoilers here. Please only use this if you absolutely need to. Select the level you need help with from the links below. If you’re not sure what level you’re on, hit F1 to bring up your computer screen. The level name should be at the top.
One more thing; please don’t cheat. If you do, you could totally screw up the order of events and mission goals. This would ruin the entire mission pack. It’s a much better idea to use this walkthrough if you get stuck.
| 1 – Prison Ship Jail Break Up the Elevator Engine Room Shuttle Bay 2 – The Orbital 3 – Beyond the Teleporter/ |
4 – The Orbital (part 2) Back to the Shuttle Not!!! 5 – Run Like Hell 6 – Prison Ship (part 2) 7 – Asteroid (secret level) |
1 – Prison Ship
Right outside the cell where you start out is a console. Pushing the button on it will toggle the lights on and off. On the far wall is a ladder. Climb the ladder and walk along the top row of cells. Across from you there is a control room. Shooting a button near the control room door will rotate a walkway into place. This will enable you to cross to the control room.
Once inside the control room there’s a shotgun and some ammo for you. Shooting the vent will reveal a secret. On the console by the window there is a lever which deactivates the forcefield for the main prison door, but only for a brief period of time. What you need to do is push the lever, exit the control room, jump down and run through the main door before the forcefield resets. If you don’t get there in time you’ll have to do it all again.
Now you’re in a hallway outside the engine room. You won’t be able to get in there yet because you need the red key. Above you is a secret invulnerability. I thought the only way to get this secret was by rocket or grenade jumping but I’ve been proven wrong. Here are some demos that were sent to me of the 1rst method and the 2nd method. If your not familiar with running demos, just make a directory in you quake2/escape folder called “demos” and place the files in there. In Q2, pull down the console and type “map inv1.dm2” or “map inv2.dm2” without the quotes.
At each end of the hallway, there is an elevator. One of them will take you up to the deck 1. The other one will only take you from deck 1 down to where you are now; deck 2. Take the elevator up and walk through the hall into a large room with a sky light. There are 3 doors. The middle one is locked from the other side. You’ll need to enter the other 2 rooms.
Comm Center: Push the button on the console to get an important message from Earthforce Command. This is where your computer (F1) becomes active and gives you your first mission goals. “Destroy a secret weapons lab on the planet”, which you do at the end of the mission and “access the engine room and disable the engines”, which is your immediate goal.
Security: Here you’ll find a good supply of weapons, ammo and armor. Take everything.
After completing the tasks in those 2 rooms, you will be confronted by an Iron Maiden. She’ll give up a red key when she dies which will give you access to the engine room.
From the central room you’ll be able to get to the bridge. Other than killing all the enemies, there won’t be much you can do there since you haven’t yet acquired the right tools. Having a look around may give you some idea of what’s to come though.
Take the down elevator back to deck 2, unlock and enter the engine room. You’ll find a small control room which has larger engine compartments on either side. In each compartment there is a console with a switch on it. Hitting the switch will turn the red engine lasers to yellow for a short period of time.
What you need to do is hit the switch, run up the ladder, crouch into the small space under the laser and grab the power cube out of its holder. This will disable the laser and the engine. You need to do all this before the laser turns red again or else you’re toast. Taking the cubes from both compartments will complete your task. You’ll then be told to get the hell out of there as something is now about to blow. Well something does blow in the control room which leaves a nice hole in the wall for you to escape into the shuttle bay, which is you’re next goal.
I should note that at the far end of each engine compartment there are some goodies. On one side there’s a grenade launcher and on the other side there’s some combat armor. A bit of jumping and crate shooting is involved. There’s also a secret which you can crouch to get while you’re crawling through the hole in the wall.
First you’ll need to kill the tank. I found the best way to do this is to run by him to the other end of the bay, then strafe back and forth lobbing grenades and avoiding his rockets. Next you have to get up to the platform. You can either jump on the wall supports or the docking clamps and the shuttle itself.
Once on the platform, you’ll find both doors locked; one needs the blue key and the other is locked from inside. Shoot the window out and enter the control room that way, then push the button and watch the shuttle start up. Jump on board the shuttle, hit the button in the cockpit and you’re on your way to the orbital.
2 – The Orbital
This one is pretty straight forward. After you depart the shuttle, you’ll end up working your way from the shuttle dock into a warehouse type room with a big lifter in it. It’s also possible to go all the way around to a secondary shuttle dock but that’s a dead end. You’ll eventually have to go back to the warehouse.
In the warehouse walk up the ramp and hit the button to start the lifter. This will deposit a crate in such a position that you can use it to jump over the end wall. You can also use the crate to jump to other crates in order to collect goodies plus the secret mega-health. Once you jump over the wall, be sure to pick up the plasma rifle. Then it’s just a matter of hopping down and going through the doors into the teleporter room.
Once inside the teleporter room, you’ll notice 2 doors. Each door leads to an elevator, which in turn leads to a teleporter power section. Walking up to the clear holders will deposit the power cubes that you stole from the ship. Insert both power cubes and the teleporter is ready to rock. All you need to do now is go stand on the tele pad.
3 – Beyond the Teleporter/
With the Enemy
I decided to combine the instructions for these 2 levels since you need to cross back and forth between them many times.
Ok, so you’ve arrived on the planet. If you manage to kill all the soldiers in the teleporter building before they hit the alarm switch you’ll be much better off. The alarm will just bring more bad guys. When you head towards the door there is a cat walk with some monsters above you. Try not to shoot the 2 control panels while you’re taking them out. Once you’ve cleared the entire area take the plat up there and start the lifter. Then go back down and pick up the hyperblaster if you already haven’t.
When you finally get outside you will have a few options. Turning right will take you to a living quarters. This is one of the places in the map that you don’t really need to go to but there’s some good fun to be had if you’re in the mood for hunting strogg. Either way you’ll eventually have to go left and look for the lab.
There are two ways to get to the lab. If you didn’t break the control panels earlier, you’ll have use of the laser train. Just step on the switch and hop aboard. It will take you on a beautiful journey which ends on the roof of the lab. If you broke the train controls or if you feel the need for exercise, you can swim across the small pond and climb through the canyon to the lab.
If you rode the train all the way to the roof you’ll find the door to get inside is locked. Don’t worry, you can jump down the shaft to get in. If you fell off the train or if you walked to the lab you won’t be able to get to the roof. Don’t worry there are two other ways in.
One option is to climb the very narrow rock ledge which will take you to the labs balcony. Watch out, there’s a soldier ready to hit another alarm here.
The other option would be to jump in the water and swim into a cave. Once inside the cave you’ll have to climb and jump your way around until you find an opening into some kind of pumping station. Then you’ll be able to climb up a pipe and enter. Don’t forget to take the rail gun.
Once again, you have a few options here. If you entered through the roof or the balcony, you’ll end up in tall room with crates and many ledges. Hitting a switch will start a motorized platform which will allow you to jump your way to the first ledge. Then it’s a matter of taking a lift up to the next level and into the inner lab. This is probably the most direct but toughest of the two options because of all the Gunners showering you with grenades.
The other option is to cross through that room and make your way into the living quarters. This area is linked to the pumping station where you would have entered if you came through the cave. In the pumping staion there are several Berserkers. One of them is carrying a security pass. Make sure you pick it up once you kill him.
A series of rooms and stairways in the living area will eventually bring you to a door, locked to those without a security pass. This is the alternate way into the inner lab. I’m not going to bother describing every room in the living area but you should be able to find your way through it and into the inner lab without much trouble.
Ok, you made it to the inner lab but the door is locked. Pick up the data cd near by. It has the coordinates to help you blow this sucker from space. Now all that’s left is to turn off the defense grid. I’ll give you a tip right now. The door to the defense grid is blocked by lasers. While you’re still near the lab, you should disable them. This will save you a trip later.
Assuming you’re in the room where you picked up the data cd; there should be a set of stairs which leads to a large door and continues to a cat walk.The cat walk extends into another room with a lava floor. The switches for the lasers are in the lava room. You need to shoot the glass and then the buttons on either side of the cat walk. Each will cause an explosion and a little shaking. Now the lasers have been disabled so it’s time to head to the defense grid.
Once again you have 2 choices here. You can go back to the other room and exit the lab through the big door. The switch is under the walkway. This will take you out to the roof of the lab. From here you can jump down to a ledge and go through another large door. The other option is to jump off the platform in the lava room right at the point where the lava ends. From there you’ll be able to hop along a narrow path which ends up in exactly the same place as the other option does; just inside the large door next to the lab.
From here it’s a short walk to the defense grid generator. I hope you took that quad from the roof of the lab though. That supertank is going to be a bitch to kill without it. Once you’re past him, enter the building and hit the switch to turn off the defense grid. Now it’s time to head back to the teleporter.
In the power grid building is are a set of stairs that leads down into the lab. If the laser train is still functioning, go to the roof of the lab and take it back to the teleporter. If the laser train controls have been blown out, you’ll have to take a different way back.
Remember the pumping station and the cave? You need to go back there. Walk down the stairs, through the living quarters and into the cave. In the cave there is a deep pool. Dive down deep and you’ll be sucked along by a current. Eventually you’ll end up in the living quarters next to the teleporter building.
4 – The Orbital (part 2)
Hey, what’s with all the explosions and shaking? Well it seems those power cubes you got from the ship weren’t completely compatible with the orbital after all. On your way back to the shuttle, watch out for traps and make sure you pick up the rocket launcher.
Doh!!! Fooled you :-P Don’t worry…head back the way you came and a door will open.
5 – Run Like Hell
Just what you were hoping for, right? More shaking and exploding. The fact of the matter is; you only have 4 minutes to finish this level or else you die!!! There are lots of goodies and secrets in here but getting them will slow you down. Just how many you stop for is up to you.
Once you exit the really tall room, you’ll notice the strogg have put up a forcefield to block your way. Cross the hall and head down into the room with the blue lasers. Grabbing the blue key in the middle will deactivate the force field. Run back up and continue down the hall. Eventually you’ll find another shuttle waiting
6 – Prison Ship (part 2)
Now that you have the blue key, you’ll be able to go through the locked door in the shuttle bay. Walk down the hall until you come to a T. To the left is the med center. If you need health, they’ve got it. To your right is the space port where you can grab a space suit and space walk to the quad and bfg. Straight in front of you the hall continues to a room with a large skylight. Remember this room from the beginning of the mission? From here you’re only steps to the bridge. I should point out the the security room has been re stocked with weapons and armor.
(top)
Well, this is it. This is were you get to complete the primary mission goal. Slip the data cd into the reader on the bridge. Now the coordinates are set. Walk up and hit the switch to the right by the front window. This will release high powered nuclear missiles at the planet. You have launch about 7 before the lab is completely destroyed. You’ll also have to fend off an attack from some other strogg vessels. That won’t be a problem; hit the button on the left by the front window. This will start your auto targeting laser. Don’t let the strogg fire on you too long, they could damage your ship.
7 – Asteroid (secret level)
Remember that space walk you did to get the quad and the bfg? Well if you tried to look over the edge of the ship you would have fallen off and found the secret level.
So there you are, on an asteroid far below the ship. There are lots of goodies on asteroids above and below you. After you kill all the flying monsters the big boss will come crashing out of an exploding rock. This is going to be one hell of a battle. Once you deal with him, look for an asteroid slowly traveling up and down. It has another space suit on it which is a good thing, I’m sure the one you’re wearing is about to expire. Anyway, jump on the asteroid and it will take you back to the ship.
(top)https://web.archive.org/web/20000818063522/http://www.planetquake.com:80/lm/
