

Boomstick Joint: Paul ‘z0dd’ Paella’s z0ddCTF1 Reviewed by Darkseid-[D!]


Boomstick Joint’s Q2CTF Map ReviewsReview by Darkseid-[D!] |
Map: z0ddCTF1 – 1.17MbAuthor: Paul ‘z0dd’ Paella |
Players: 2 Team ctf 2 – 11 players max. All items and weapons excepting BFG10k.
Well this is the first map of Z0dds that Ive ever seen, and to be honest, its a goodie. Fully functional with the recent 1.50 release, itll run quite happily in: Lokis Minions CTF, Expert CTF and Chaos CTF. You might wonder, why is this fewl name checking mods, well grasshoppa, some maps out there were made for specific mods and depend on triggers and code therein. The breakable features inside LMCTF being one such idea, and done correctly this can alter the play and flow of the level. The map is symmetric but the weapon placement is not, 90% of the firepower is mirrored, with the exception that the red team gets the railgun to the blues rocket launcher. Horses for courses, but thought it needed mentioned.
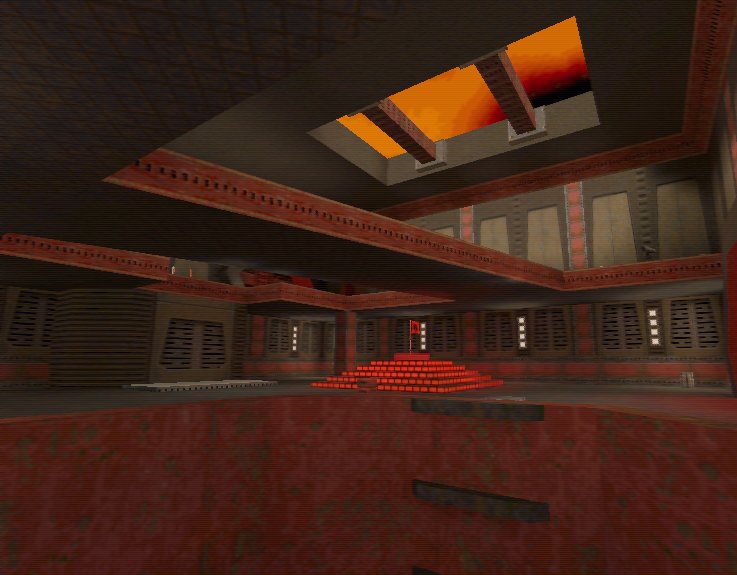
Ok to begin, Ill run the review from the blue base outwards treating the blue flag room as the SOUTH end of the map. The flag room consists of a large open plan lower floor with the flag sitting on a pedestal roughly central. Various goodies such as health, ammo the hyperblaster and combat armour are scattered around the periphery of the room. A door in the nothern wall leads to the outer area of the base and as a side note it CAN be jammed shut if you know the trick. A large water pipe, like in Q2CTF1 Mckinley base sits in the north east corner and this leads via several twists to the mid section of the map between the bases. A lift on the southern wall leads to the upper layer, which of course can be grappled to as well. This upper level is more or less a series of platforms spanning the room but leaving adequate visibility and movement room. There is one main exit from this room in the extreme sout eastern corner which loops via several long straight corridors to the outer area of the base, perpendicular to the other exit from the flag room. Goodies abound up here and the corridors hold health and a chaingun with a full ammo load, a side note, this area is railgun alley, and the grapple can be used to sling you along rapidly.
Ok so we’ve moved to the outer area of the base just outside the flag room, what can we see. Well on the south western wall (remember the flag room is S) you have a lift leading to the upper corridors and a large water tunnel. I must congratulate the author on this ‘area’ the high skylight is extremely well put together and textured, it _fits_ in rather well and is believable. The water tunnel leads down to another narrow water tunnel which in turn opens out into a circulator/agitator room. This room has a giant cog/mixer, much like those seen in Half life, a combat armour and a power screen, the teleporter offers the only way out of the room. This room is actually midway between bases and the gratings are one way only, so it cannot be used as a direct assault route between bases. Having said that you _could_ have someone open the grate from the other side for you providing a nasty way to get the drop on your opponents. Continuing down the outer area the corridors follow a lazy Z shape and are extremely wide and tall, various weapons and ammo are dotted about. To the sides of the corridors lie raised walkways, this is where most of the goodies lie, making going up on those walls risky from splash but worthwhile in rearming.
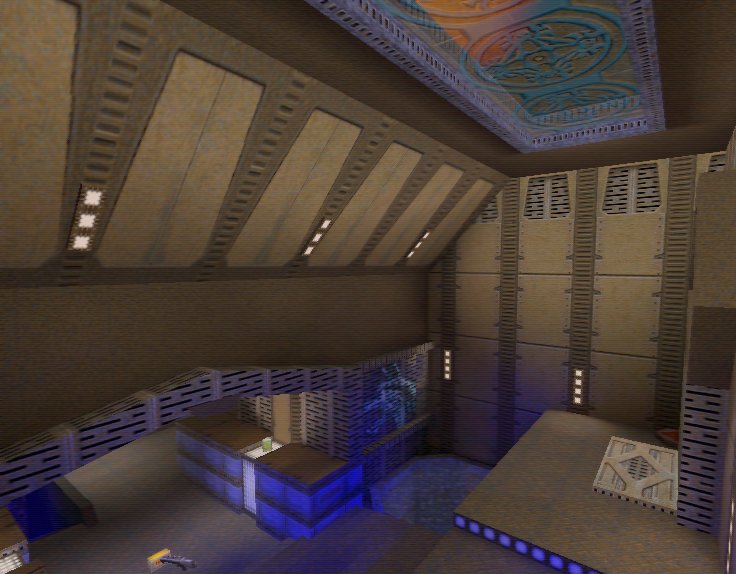
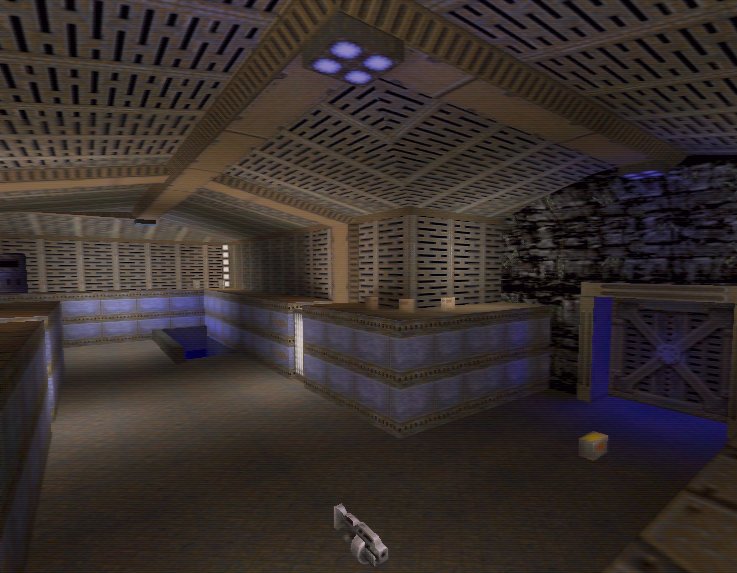
Two staircases leaded down off the mid area, as well as two hatches but these Ill come back to. The staircases lead north and down to a side room, which contains the power armour, a grenade launcher, medipaks, some stimpacks and the adrenaline. The room is two tier, with the health and amour sitting on the lower level, with the gl and others sitting on raised platforms, accessible either by the lift or the handy dandy lift tucked in the northeast corner. You didnt mention the hatches, ahh patience grasshopper, good things come to those who wait. The hatches, oh yes, they sit on the upper level of the side room just at the grenade launcher and provide a further means of entry and egress. They also provide a reasonable view of the area and can be used as guard slots, however their sizes makes manuevering awkward and you open yourself up to splash. Continuing on down the outer area leads you to a large square blast door much like those from the mines area.
The outer area is the midpoint of the map and is worthy of further description. This map is called tower, and here lies the tower, a large erection (fnar fnar) standing as the mid point between the two bases. This area is one big canyon/open cast mine area and utilises several rock textures and is semi reminiscent of Q2ctf6 and the rogue mission pak. The lower area is basically a large pool of water where the water tunnels originating in the flag rooms lead to. Sitting central is our tower, the body is solid, but it has a belfry (at the top dummy) open on four sides with several goodies including the maps only quad. The view from up here is good and provides a good lock down area, but the narrow openings and low ceilings make it very vunerable to splashing by rockets. A walkway spans the water between the two base doors and provides a narrow walkway around the tower, whats nice is the tower doesnt obstruct the view between bases so you can pull some nice grapple hops. Along the door side of each canyons lies an ascending ledge, with goodies upon it. One side has the backpack, the other the megahealth.

D! Perspective.
Oh yes, finally an unbiased map, one that doesnt allow the O! to run rampant or doesnt allow D! squads to lock things down tighter than Gestalt when its hist turn at the bar. Assuming you have a 3 person D! squad, One in the flag room to cover the water pipe and main entry way. One in outer area, patrolling back to the upper corridors and providing support (and getting it) from the flag room D!. The final member in the centre area quad hogging and watching for scuba attacks. If a 4th member should miraculously become free, outer base to midpoint roamer. If you can get and hold the mid area the enemy is gonna find it very hard to get out of their base let alone get into yours.O!
O! Perpective.
Again try and retain control of the mid section its critical in this map, simply as all routes lead through here (bar one). The only route that doesnt lead through here is the one in the flow room (holding the power screen), these grates open one way only. But timed correctly an O! in the enemy base could take a swim and let you in, youd take some drowing damage but you’d have bypassed large areas. However if the D! saw you go swimming…..
In summary, this map is great, If it had been released with 1.50 I certainly wouldnt have been complaining. I personally think with a little more work (there are some texture glitches) its a definite candidate for an LM map (but then what do _I_ know) and would recommend the author submit it. The whole design of the map flows well and keeps the R_speeds down nicely. One thing I must point out is that the whole base is a grapple monkeys wet dream, you can use the hook in so many different ways its not funny. While this penalises the HPBs out there somewhat I feel the layout of some areas (easy splash) redress this. Note that playing this map with ICE bot or inside Lokis CTF you get to use the offhand grapple and well, I know understand why some people can grapple so effortlessly. A few texture errors is all that I can find wrong with the map, the BFG not being present is IMHO a good thing and the slight assymetry between items makes the map that much more fun. Score, a Tasty 8 out of 10 and a candidate for the Map pak Im gonna harass Driven into letting me compile.
© 1998 All rights reserved.
Best viewed in 1024×768
https://web.archive.org/web/19990830175439/http://www.captured.com:80/boomstick/q2ctfmaps9.htm
