
Gibbed.com: Action Quake 2 Tactics by The Black Angel
The most used weapon in the game will most likely be the H&K Mark 23 pistol. Set the thing to semi-automatic mode. Accuracy counts the most, plus you don’t want to run out of ammo in the middle of a fight. For all you HPBs out there, I recommend the akimbos. Twice the fun. Accuracy is better than MP5 and you can control the shots. You also have to know when to bandage. This is important! You don’t want to be in the middle of a fight and suddenly bandage. Then you will be such an easy kill for them. If the enemy is standing still, then you can aim for the head.
Probably the most underestimated weapon of all is the Sig Sauer SSG 3000 sniper rifle. Well, maybe throwing the knifes is hard, but this is different as well. I personally prefer this weapon equipped with a silencer in teamplay. This of course depends on the map. On Urban, I place more bullets in heads than Santa presents on Christmas. On Chriscity3, however, I have to either snipe from the ground or roof, making it hard. Also everyone is running around with M4s and MP5/10s shooting at me when I get near them. All I can do is take lucky potshots with a sniper rifle or a pistol. The best maps for snipers are the Ruins trilogy, (Ruins, Ruins2, Ruins3), Urban, Cliff, Clif2, Actcity2, and anything you might feel comfortable sniping on.
If you want to be a good sniper but can’t just make it, then here’s help. I am still not the “best,” although someday I wish to be. I am learning many things through trial and error. These are the things to help you:
First of all, make sure you ping is between 1-450. I tried at like 600 and a hit was pure luck (or a dumb enemy that doesn’t move). 450 is the ping that I recommend to be that maximum for sniping. Make sure that you don’t have a huge packet loss, making you lag. I could swear that I am beginning to see that little “disconnected” icon that appears in the upper left of the screen in my sleep. =) If you want a nice .cfg (config) file that I made, then go to the AQ2.cfg page.
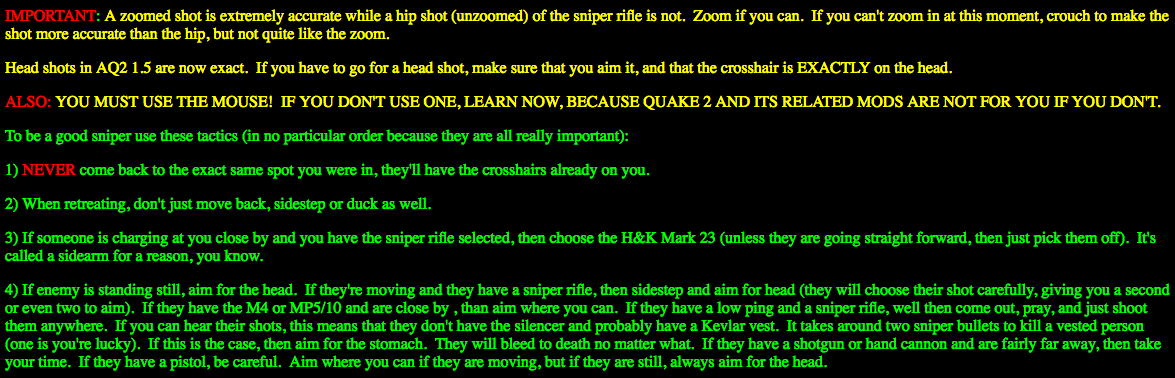
IMPORTANT: A zoomed shot is extremely accurate while a hip shot (unzoomed) of the sniper rifle is not. Zoom if you can. If you can’t zoom in at this moment, crouch to make the shot more accurate than the hip, but not quite like the zoom.
Head shots in AQ2 1.5 are now exact. If you have to go for a head shot, make sure that you aim it, and that the crosshair is EXACTLY on the head.
ALSO: YOU MUST USE THE MOUSE! IF YOU DON’T USE ONE, LEARN NOW, BECAUSE QUAKE 2 AND ITS RELATED MODS ARE NOT FOR YOU IF YOU DON’T.
To be a good sniper use these tactics (in no particular order because they are all really important):
1) NEVER come back to the exact same spot you were in, they’ll have the crosshairs already on you.
2) When retreating, don’t just move back, sidestep or duck as well.
3) If someone is charging at you close by and you have the sniper rifle selected, then choose the H&K Mark 23 (unless they are going straight forward, then just pick them off). It’s called a sidearm for a reason, you know.
4) If enemy is standing still, aim for the head. If they’re moving and they have a sniper rifle, then sidestep and aim for head (they will choose their shot carefully, giving you a second or even two to aim). If they have the M4 or MP5/10 and are close by , than aim where you can. If they have a low ping and a sniper rifle, well then come out, pray, and just shoot them anywhere. If you can hear their shots, this means that they don’t have the silencer and probably have a Kevlar vest. It takes around two sniper bullets to kill a vested person (one is you’re lucky). If this is the case, then aim for the stomach. They will bleed to death no matter what. If they have a shotgun or hand cannon and are fairly far away, then take your time. If they have a pistol, be careful. Aim where you can if they are moving, but if they are still, always aim for the head.
5) If you want a head shot, zoom in more, it’s hard to get it on 2x. AQ2 1.5 has smaller head boxes.
6) At the beginning of a round (on teamplay), go away from enemy and be at a higher place (not on roof like Chriscity3). I tried picking them off at the beginning and was first to die because of M4s and MP5/10s. Also try not to be seen.
7) If you are behind something, then take a shot and get behind it. If you miss, your target will be looking everywhere for you. When you feel he forgot about you, slowly emerge and shoot again.
8) Don’t always camp…….err snipe in the same place, people will be able to hunt you down easily.
9) Know your maps!!! You have to know when and where the enemy will come behind you or where is a good retreat place.
10) If there are a couple targets in your view, pick the hardest one. If a guy closer to you has M4 and one farther the MP5/10, go for the MP5/10 first, since it is more accurate. If the guy with the M4 is a little farther, take him out, since it is a good anti-sniper weapon. However, this may not always be the case. I saw people with M4s do many things and also people with MP5/10s. Choose the target you feel is right (if they have a laser sight, then go for them). Also remember that a target that is shooting a pistol at you is VERY dangerous, since the pistol has good aim. If you get behind cover and hear the person still shooting, stay back. They expect you to come out while they are shooting. They will waste some shots on you, making the kill easier, especially if you hear the <<click>> of their gun.
11) If you are in a sniper vs. sniper situation, then you will have to change a few things. If they are still, aim for the head. A good sniper will shoot and retreat. If they shoot and miss, they will have to reload. It takes about a second to do so. Take advantage of that, come out and cap ’em. Some snipers move around frequently to avoid shots, sometimes it is a good tactic while being zoomed and moving. Move too. Keep the crosshairs on them if you can. If they stop, shoot. If it doesn’t work, change your place and catch them by surprise. Also don’t duck too much. Almost always any hit on a ducking target is a head shot.
12) Keep the chamber loaded. If you fire off 1 or 2 shots and finally cap him, reload those shots. An exception is if there is an enemy right near.
13) Don’t waste your shots. You only get 16 in teamplay. Make each on count. If you know that it won’t kill him, don’t just shoot anywhere. It won’t scare him, it that’s what you’re trying to do.
14) Get a partner to cover your back. It is so easy to sneak up on an unsuspecting sniper with his zoomed weapon, and just kill kill with a head shot.
15) Know when to use the silencer, and when the Kevlar vest. Use the silencer on maps like Urban (long level with some hiding spots), Ruins3 (dark and roomy), Lock n’ Load (dark and big), Subway1 + 2 (some nice dark places, like the roof from across the M4), and any dark map.Use the Kevlar vest on maps like Cliff 1 + 2 (open and lit area), Team Jungle (well, it’s really your decision here because it’s a big map).
16) I am asking people of how they think a sniper with a ping of 270 – 350 is any good if he doesn’t get head shots all the time. From what I have received, that sniper is still very good. So don’t feel bad if you’re laggy and can’t kill anyone with a head shot, or are missing moving targets.
REMEMBER, IT’S NOT CAMPING, IT’S SNIPING!!!
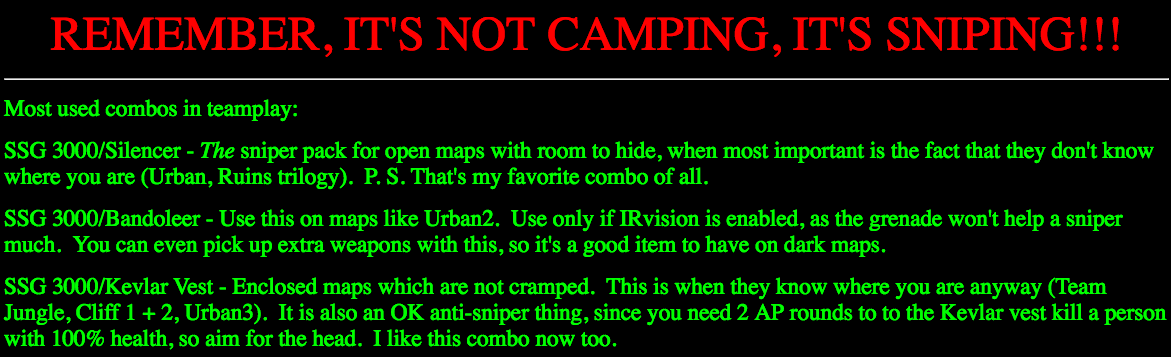
Most used combos in teamplay:
SSG 3000/Silencer – The sniper pack for open maps with room to hide, when most important is the fact that they don’t know where you are (Urban, Ruins trilogy). P. S. That’s my favorite combo of all.
SSG 3000/Bandoleer – Use this on maps like Urban2. Use only if IRvision is enabled, as the grenade won’t help a sniper much. You can even pick up extra weapons with this, so it’s a good item to have on dark maps.
SSG 3000/Kevlar Vest – Enclosed maps which are not cramped. This is when they know where you are anyway (Team Jungle, Cliff 1 + 2, Urban3). It is also an OK anti-sniper thing, since you need 2 AP rounds to to the Kevlar vest kill a person with 100% health, so aim for the head. I like this combo now too.
MP5/10/Laser Sight – Deadly combo used by most. Good on all levels, really.
Hand Cannon/Silent Slippers – Close range, anti-sniper pack. Mainly good on enclosed and dark levels (Ruins3, Subway1 + 2).
Combat Knife(s)/Silent Slippers – The back stabber’s pack. Also good on dark and narrow levels (Kumanru, Monastery, Subway1 + 2)
M4/Bandoleer – This is one of the only cases in which a bandoleer may be a good idea. Instead of one, you an carry three extra clips.
M4/Kevlar Vest – This is the veteran’s pack (nifty name, huh). Bad only on sniper levels where they can pick you off before you see them.
Shotgun/Kevlar Vest – An average pack. Good to defend snipers with.
https://web.archive.org/web/*/http://gibbed.com:80/blackangel/tactics.html
The Black Angel’s AQ2 Config
//Axshun/Action 1.5 Keys
//Use these settings if you play with the arrow keys.
//This is not for the people who use the character “asdf” keys to move around.
//Name this file autoexec.cfg and put it in your C:\Quake2\Action directory.
bind pgdn “reload”
bind kp_del “weapon”
bind del “opendoor”
bind pgup “drop weapon”
bind home “bandage”
bind ins “drop item”
bind kp_minus “use special”
bind c “unstick”
//Auto walk and auto run
alias walk “set cl_run 0; echo walking; bind shift run”
alias run “set cl_run 1; echo running; bind shift walk”
bind shift walk
//sniper rifle
alias sniper “weapon;sensitivity 8;echo 2x: sensitivity $sensitivity;bind ctrl 4x;bind end quick1a”
alias 4x “weapon;sensitivity 6;echo 4x sensitivity $sensitivity;bind ctrl 6x;bind end quick1b”
alias 6x “weapon;sensitivity 3;echo 6x: sensitivity $sensitivity;bind ctrl 1x;bind end quick1c”
alias 1x “weapon;sensitivity 14;echo 1x: sensitivity $sensitivity;bind ctrl sniper;bind end quick1d”
bind ctrl sniper
//Zoom out to 1x fast
alias reset1x “sensitivity 14;bind ctrl sniper;bind end quick1d;echo Quickly zooming to 1x”
alias quick1a “weapon;wait;weapon;wait;weapon;reset1x”
alias quick1b “weapon;wait;weapon;reset1x”
alias quick1c “weapon;reset1x”
alias quick1d “echo already at 1xzoom”
bind end quick1d
//default sniper aliases reset key (in case I die, bandage, or match ends etc.)
bind * “sensitivity 14;bind ctrl sniper;bind end quick1d;echo Sensitivity and Sniper reset”
//Automatically changes the crosshairs
set crosshair 3
alias c1 “set crosshair 1;bind . c2”
alias c2 “set crosshair 3;bind . c1”
bind . c1
//Weapon selection keys
bind kp_end “use Mark 23 Pistol”
bind kp_downarrow “use M3 Super 90 Assault Shotgun”
bind kp_pgdn “use MP5/10 Submachinegun”
bind kp_leftarrow “use Handcannon”
bind kp_5 “use Sniper Rifle”
bind kp_rightarrow “use M4 Assault Rifle”
bind kp_home “use Combat Knife”
bind kp_uparrow “use grenades”
bind kp_pgup “use A 2nd Pistol”
// Teamplay Radio Commands
bind p “partner”
bind o “deny”
bind i “channel”
//say numbers
bind 1 “radio 1;say_team 1”
bind 2 “radio 2;say_team 2”
bind 3 “radio 3;say_team 3”
bind 4 “radio 4;say_team 4”
bind 5 “radio 5;say_team 5”
bind 6 “radio 6;say_team 6”
bind 7 “radio 7;say_team 7”
bind 8 “radio 8;say_team 8”
bind 9 “radio 9;say_team 9”
bind 0 “radio 10;say_team 10”
//Radio on or off
alias radiopower “radio_power 1;bind F2 radiopower2”
alias radiopower2 “radio_power 0;bind F2 radiopower”
bind F2 radiopower
//Toggles your radio gender
alias rgen1 “radiogender male;gender male;bind F3 rgen2;echo radio gender male”
alias rgen2 “radiogender female;gender female;bind F3 rgen1;echo radio gender female”
bind F3 rgen1
bind F4 “radio taking_f;wave 0;say_team Taking fire!”
bind F5 “radio enemys;wave 4;say_team Enemy Spotted!”
bind F6 “radio enemyd;wave 2;say_team Enemy down!”
bind F7 “radio im_hit;wave 0;say_team I’m hit! %H helath and bleeding.”
bind F8 “radio teamdown;wave 4;say_team Team-mate down!”
bind F9 “radiopartner cover;wave 0;say_team Cover me, %T!”
bind F10 “radiopartner go;wave 4;say_team Go!”
bind F11 “radio treport;wave 1;say_team Team report in! State your health, weapon, item, and ammo”
bind F12 “radio reportin;wave 1;say_team Reporting in with %H health, %W, %I, and %A!”
bind n “I got a bad wound, I am going to die! This is it for me for this round!!!;wave 0”
bind m “say I got a bad wound, I am going to die! This is it for me for this round!!!;wave 0”
bind w “radio forward;say_team Forward!”
bind x “radio back;say_team Back!”
bind d “radio left;say_team Left!”
bind a “radio right;say_team Right!”
bind q “radio up;say_team Up!”
bind z “radio down;say_team Down!”
//Mouse stuff
bind mouse1 “+attack”
set in_joystick “0”
set in_mouse “1”
set m_filter “1”
set m_pitch “0.022”
set sensitivity “12”
set lookstrafe “0”
set lookspring “0”
set freelook “1”
// Communication
bind t “messagemode”
bind y “messagemode2”
// Other stuff
bind = “sizeup”
bind – “sizedown”
bind ` “toggleconsole”
bind ~ “toggleconsole”
bind PAUSE “pause”
set msg “1”
set cl_run “1”
set viewsize “100”
bind ESCAPE “togglemenu”
set cl_predict “1”
bind KP_INS “+movedown”
//Server options
set bholelimit 40
set splatlimit 40
set shelloff 0
dmflags 528
bind * “weapon;sensitivity 12;bind ‘ sniper”
//NetGraph, to see how lagged you are
bind v “net1”
alias net1 “netgraph 1;echo Graph ON…;wait;bind v net2”
alias net2 “netgraph 0;echo Graph OFF..;wait;bind v net1”
hand 0
//Demo creation
alias demstop1 “stop; echo Current Demo Stopped;wait;wait;wait;demstop2”
alias demstop2 “echo Press ‘f’ again to start next demo in sequence”
alias dem1 “echo Starting Demo1; record demo_01; alias next_demo dem2”
alias dem2 “echo Starting Demo2; record demo_02; alias next_demo dem3”
alias dem3 “echo Starting Demo3; record demo_03; alias next_demo dem4”
alias dem4 “echo Starting Demo4; record demo_04; alias next_demo dem5”
alias dem5 “echo Starting Demo5; record demo_05; alias next_demo dem6”
alias dem6 “echo Starting Demo6; record demo_06; alias next_demo dem7”
alias dem7 “echo Starting Demo7; record demo_07; alias next_demo dem8”
alias dem8 “echo Starting Demo8; record demo_08; alias next_demo dem9”
alias dem9 “echo Starting Demo9; record demo_09; alias next_demo dem0”
alias dem0 “echo Starting Demo10; record demo_10; alias next_demo demempty1”
alias demempty1 “echo You have exhausted this session’s queue!;wait;wait;wait;wait; demempty2”
alias demempty2 “echo You must exit and archive existing demos before recording more”
alias next_demo dem1
bind r “demstop1”
bind f “next_demo”
//Skin changer
alias skin1 “set skin messiah/blade;echo Blade;bind . skin2”
alias skin2 “set skin messiah/Thedon;echo The Don;bind . skin3”
alias skin3 “set skin messiah/TheCrow;echo The The Crow;bind . skin4”
alias skin4 “set skin messiah/Kindig;echo Kindig;bind . skin5”
alias skin5 “set skin terror/skyterr;echo Sky Terror;bind . skin6”
alias skin6 “set skin terror/urbanterr;echo Urban Terror;bind . skin7”
alias skin7 “set skin terror/terror;echo Terror;bind . skin8”
alias skin8 “set skin terror/swat;echo SWAT;bind . skin9”
alias skin9 “set skin terror/swatsnipe;echo SWAT Sniper;bind . skin10”
alias skin10 “set skin terror/jungleterr;echo Jungle Terror;bind . skin11”
alias skin11 “set skin terror/desertterr;echo Desert Terror;bind . skin1”
bind . skin1
alias skindef “set skin messiah/blade;echo Blade;bind . skin2”
bind , skindef
//Use this only for a 56K modem
cl_maxfps 27
set rate 4000
//F12 was taken so use this to take screenshots
bind pause “screenshot”
https://web.archive.org/web/19991008014543/http://gibbed.com:80/blackangel/cfg.html
Urban Map Secrets
Urban (although illegal) is my favorite map of all. There are many reasons for this, but it is perfect for sniping. This map has some secrets to it. There are several pictures below for you to see things better.
Red are offensive positions!
Lime (green) are defensive positions.
In this pic, if you are on the top, your best defense is a good sniper and some men by the boxes (air vents). The boxes are important because they provide cover.
The hole in the construction building is good, unless there are snipers about. Use the poster board for cover when rushing them.
If you spawn on the middle building, the boxes can bee good if you know where the enemy is, otherwise they will pick you off from another angle. You can use the roof for cover, which is important.
Your best bet here is to use the rim of the middle roof (circled red) for your advantage. If you are on the top building, move around and wait for them to pop up behind it. Then cap ’em. If you are on the middle building, try to catch your enemy off guard by unexpectedly popping up and hitting them. You can use the poster board and the hole mentioned before. A new thing is the little place marked with an arrow. That is a vary good sniper spot if nobody sees you go in there. Otherwise it’s a waste, they’ll wait for you to pop up to take a look around and then kill you without warning.
The way to snipe is usually to be on the far left corner. In there, I doubt anyone can see you clearly. If you want to pop up, then wait in the corner and move slowly right, crouching all the time.
The wall again is your friend (or enemy) if you are on the middle building. The poster board can do you good if you want to bandage and be safe, but be sure to be far far in as you can. The area under the big structure between the buildings is good if you want to surprise snipers on top. You can fake going in, come out in the open, move around a lot, and keep on shooting.
The building connecting area is good to attack from if there are no snipers lurking above. They just wait for you to pop your head out and fire. What you can do is confuse them and act like your going one place and reappear in the same one, hoping the sniper didn’t move. The top hole is good to pick off a sniper from, but don’t use it too much. The poster can be used as an attacking position by crouching by that hole on the bottom, that is why I said to go all the way back when bandaging. The boxes on the building connector are good to pop up from and nail snipers or snipe from.
I’m sure you have seen someone jump a building and land is this place normally not accessible to players. I know of one such place. I will explain the jump: you strafe at the moment you jump. Yes, you head right, you run forward, at the exact time you jump, press a strafe key. This action causes you to go farther than usual.
You run\fly this way.
You jump and strafe here.
You’re supposed to land here.
https://web.archive.org/web/19991009074755/http://gibbed.com:80/blackangel/urban.html
